.png)
When a task is too big for a single line of work, you can break it into subtasks—smaller, individually trackable pieces that live inside the parent task. This guide explains what subtasks are, when to use them, where they appear (and where they don't), and how to create, edit, and finish them.

What you'll need
- An existing task in a space you can edit.
- A role that lets you edit that task—see Set Up a Space for who can do what.
What a Subtask is
A subtask is a child task that belongs to a parent task. Subtasks share most of the parent's purpose, but each tracks its own piece of the work, with its own status, priority, assignees, due date, and other properties.
Use a subtask when a task is real but not atomic—when finishing it actually means finishing several smaller things. A few examples:
Parent: "Launch Q3 marketing campaign".
- Subtasks: "Brief copywriter", "Approve creative", "Schedule emails", "Set up landing page".
Parent: "Onboard Acme Corp".
- Subtasks: "Send welcome packet", "Schedule kickoff call", "Provision accounts".
Parent: "Fix payment bug".
- Subtasks: "Reproduce on staging", "Patch logic", "Add regression test".
Use a separate task—not a subtask—when the work is independent enough that someone might want to find it without opening the parent first.
Where Subtasks live
Subtasks don't get a row of their own in any Space view. They never appear as standalone items on the board, list, or table, and they don't show up in My Tasks the way regular tasks do.
You see Subtasks in three places:
- On the parent task's detail page, in the Subtasks section.
- Inline in list and table view—every parent row has a caret/expand toggle right after its checkbox. Click it to reveal the parent's subtasks as a nested table within the row, with full inline editing and the same Add a new subtask... input as the detail page.
- Inline in Board view — every parent card with at least one Subtask shows a small expand toggle. Click to reveal the parent's Subtasks as nested cards. The board expand is view-only—to create a new subtask, use the detail page or expand the parent in list view.
Add a Subtask
Two surfaces let you add a subtask: the parent task's detail page and an expanded row in list view. Both use the same 'Add a new sub task...' input.
- From the parent Task's Detail page
- Open the parent Task's Detail page.
- Scroll to the Subtasks section.
- Type a title in the 'Add a new sub task...' input at the bottom of the section and press Enter.
- From the parent's row in List or Table view
- On the Task tab, switch to List view.
- Click the caret/expand toggle in the column right after the parent row's checkbox. The row expands inline to show the parent's Subtasks as a nested table.
- Scroll to the 'Add a new sub task...' input at the bottom of the expansion, type a title, and press Enter.
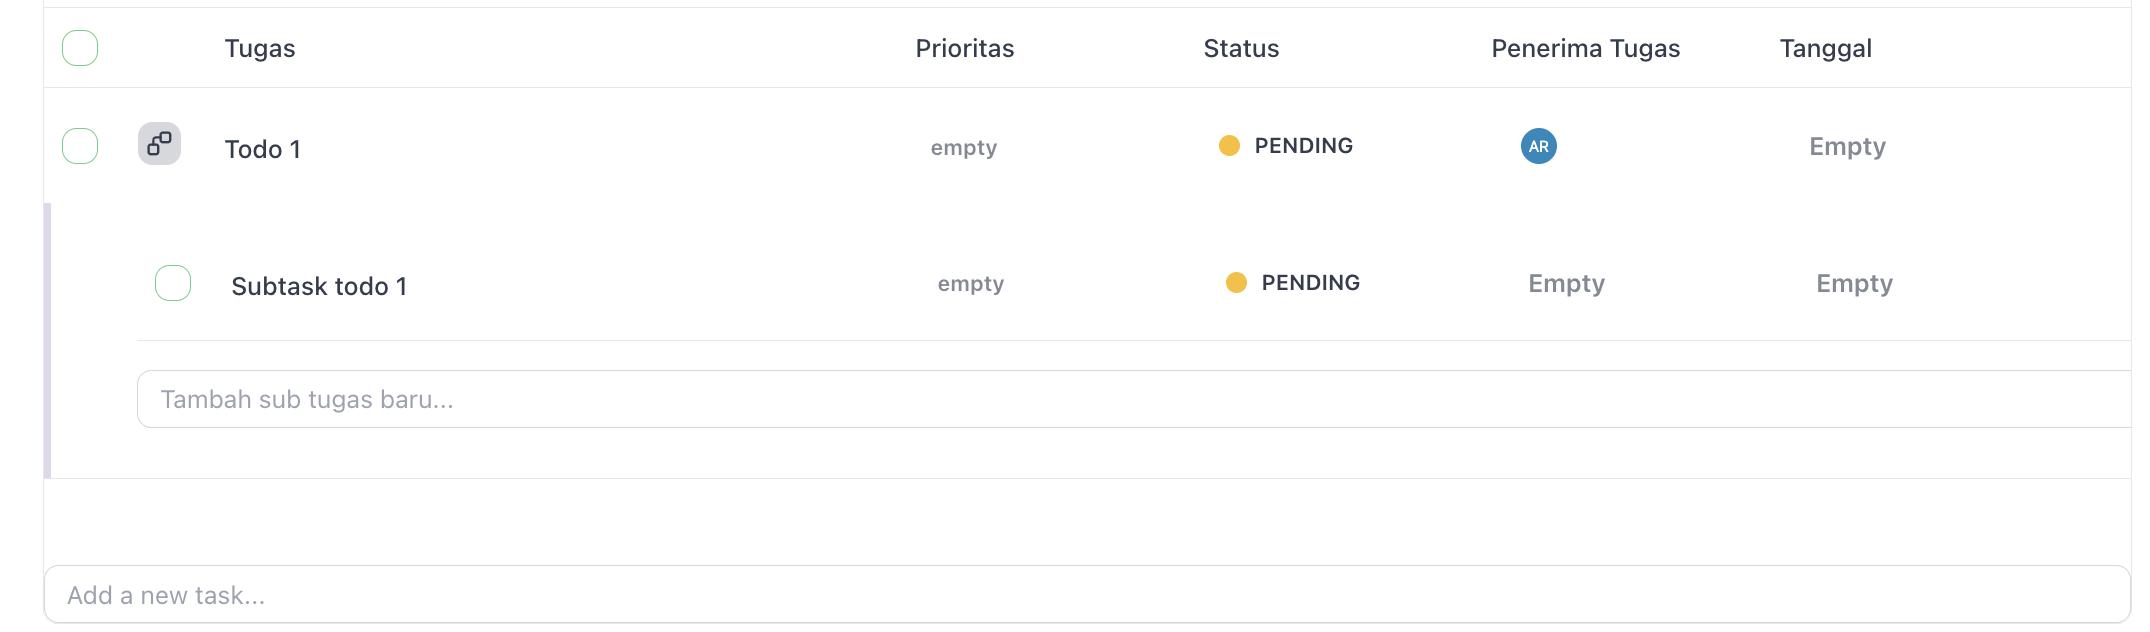
The new subtask appears in the table immediately on either surface. You can fill in the rest of the fields—Status, Priority, Assignees, Dates—by clicking each cell in the new row.
Board view also has an expand toggle on parent cards (when they have at least one Subtask), but it's view-only. To create from a Board context, open the parent's Detail page or switch to List view.
Open a Subtask's own Detail page
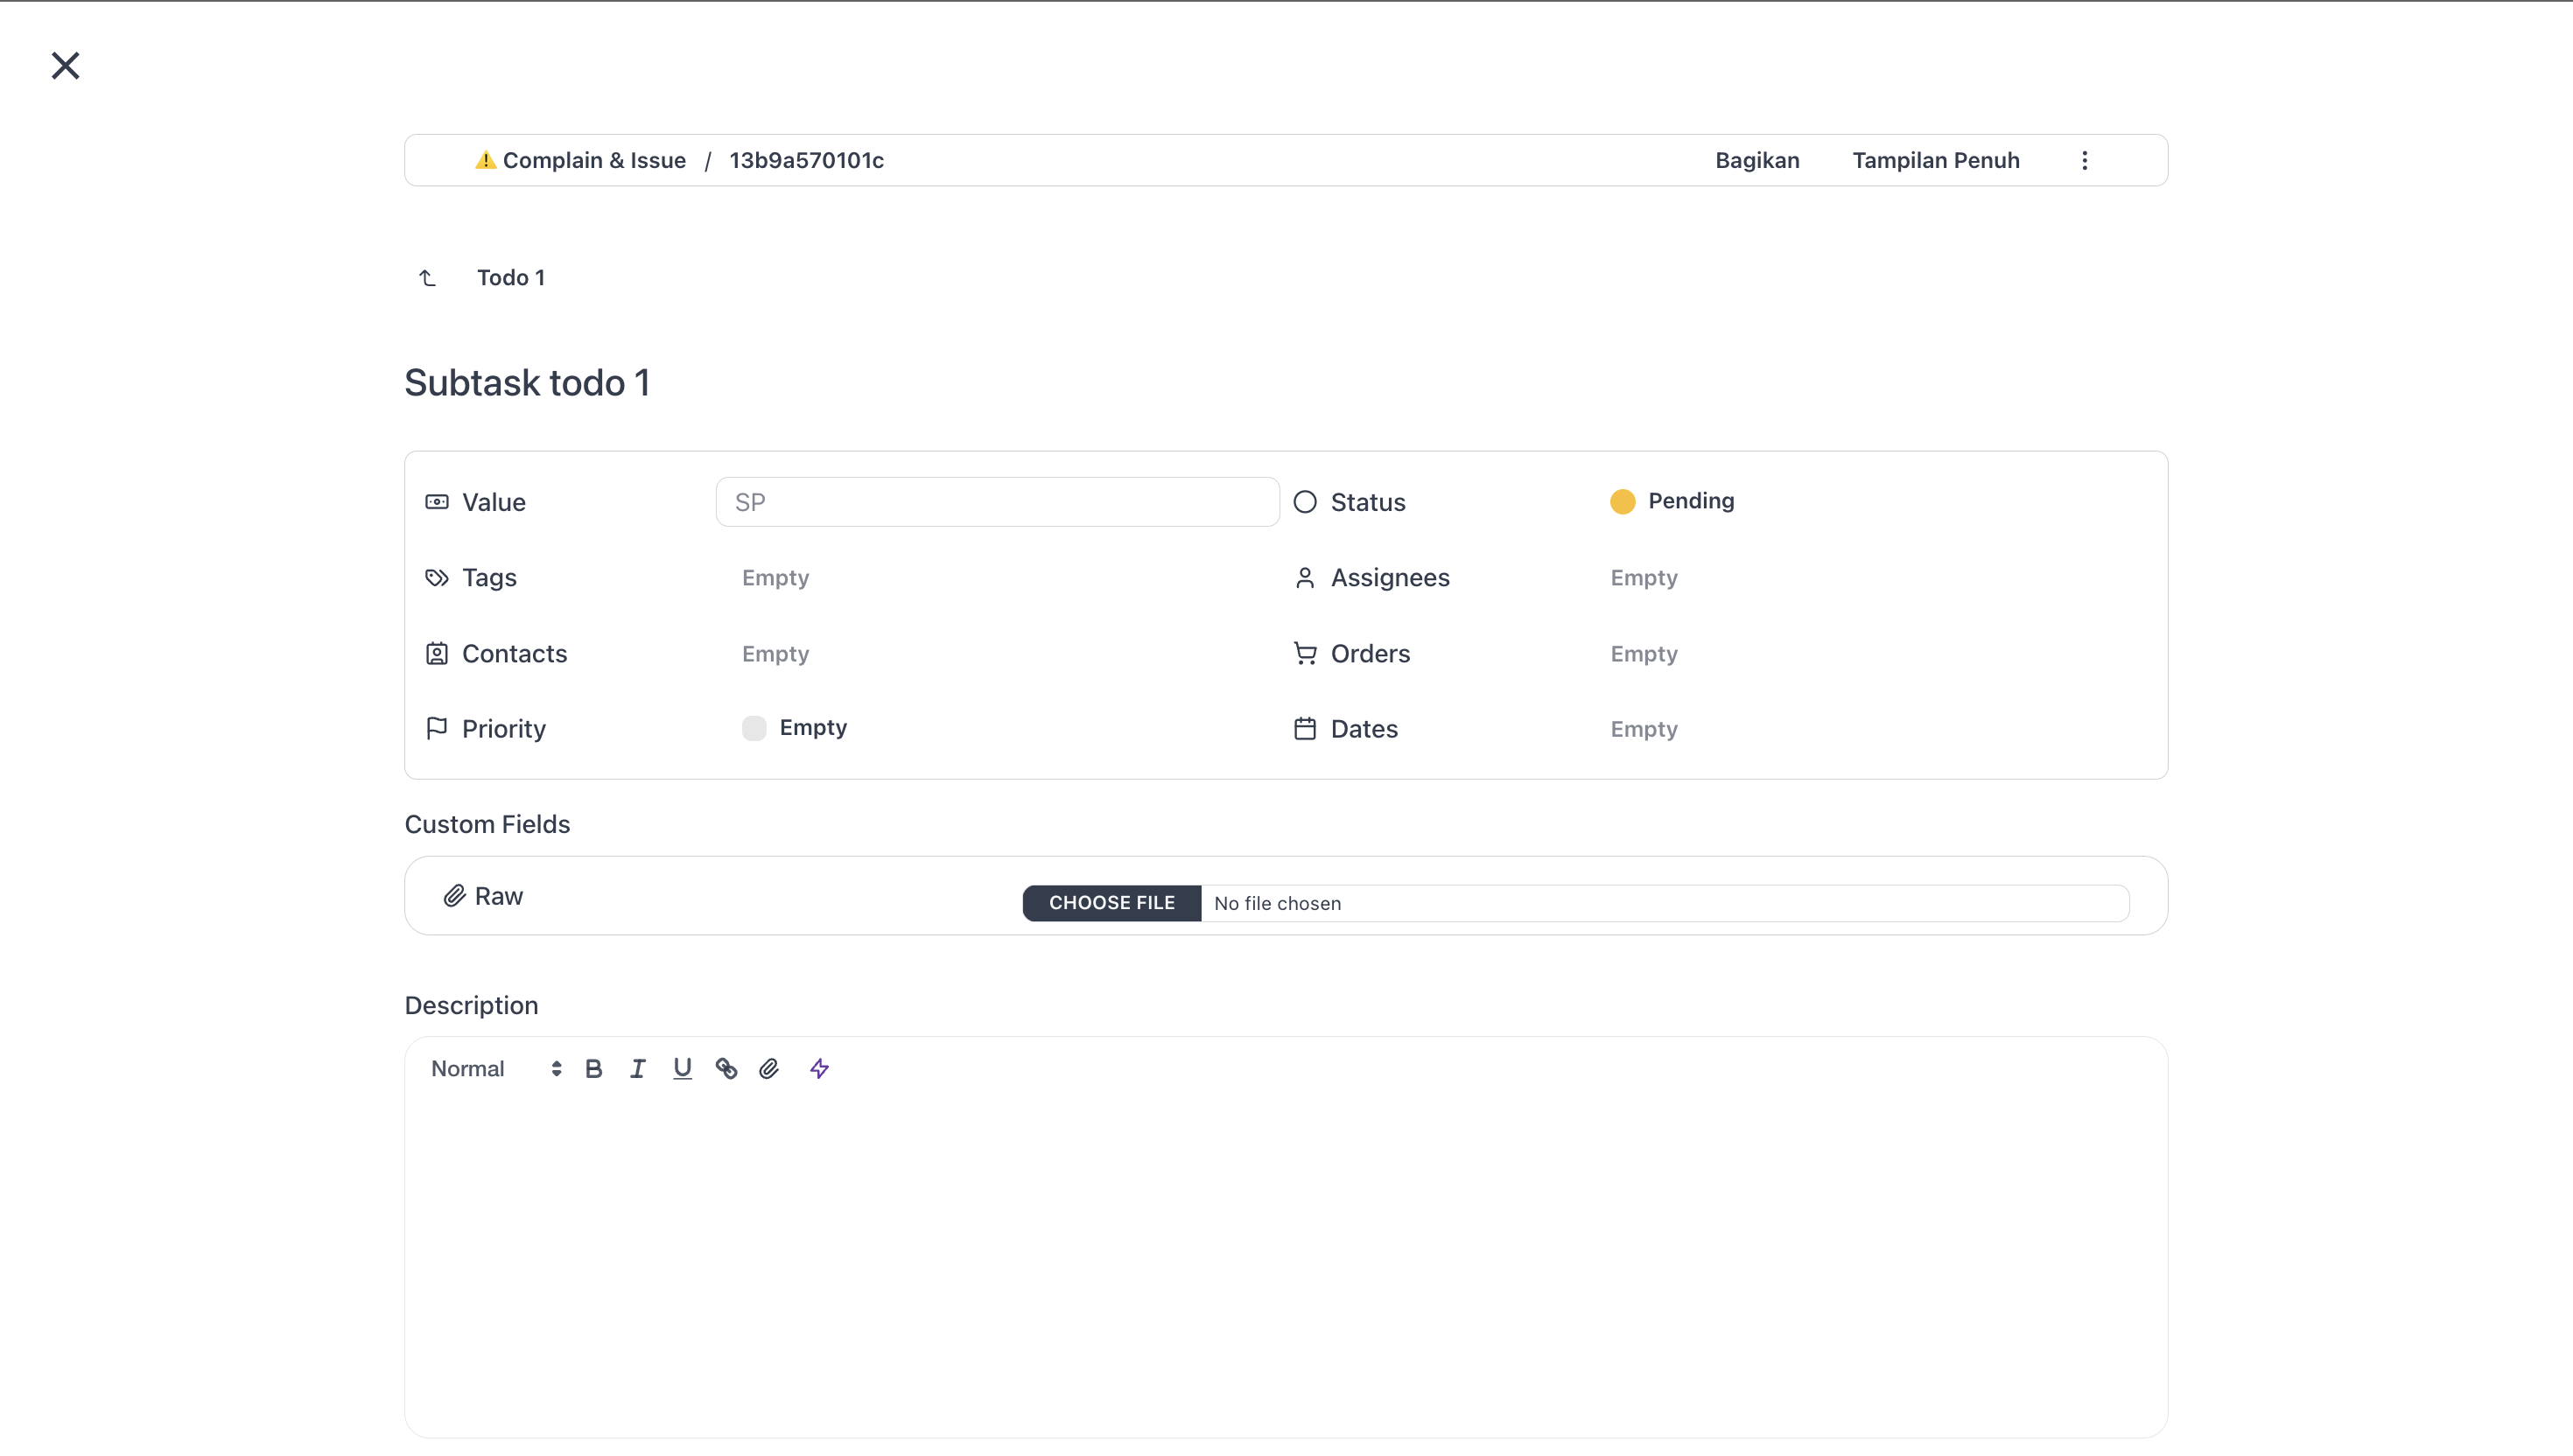
Click a subtask's title to open its own detail page. The page is the same as a regular task detail page (description editor, custom fields, linked items, discussion thread, all of it).
The only difference is a small breadcrumb back to the parent task in the header. Click it to return to the parent.
Copy or delete a subtask.
Open the actions menu at the right of any Subtask row:
- Copy—duplicates the subtask. The title gets a "(copy)" suffix; status, priority, assignees, dates, tags, and custom field values come along.
- Delete—deletes the subtask. It disappears from the table.
