.png)
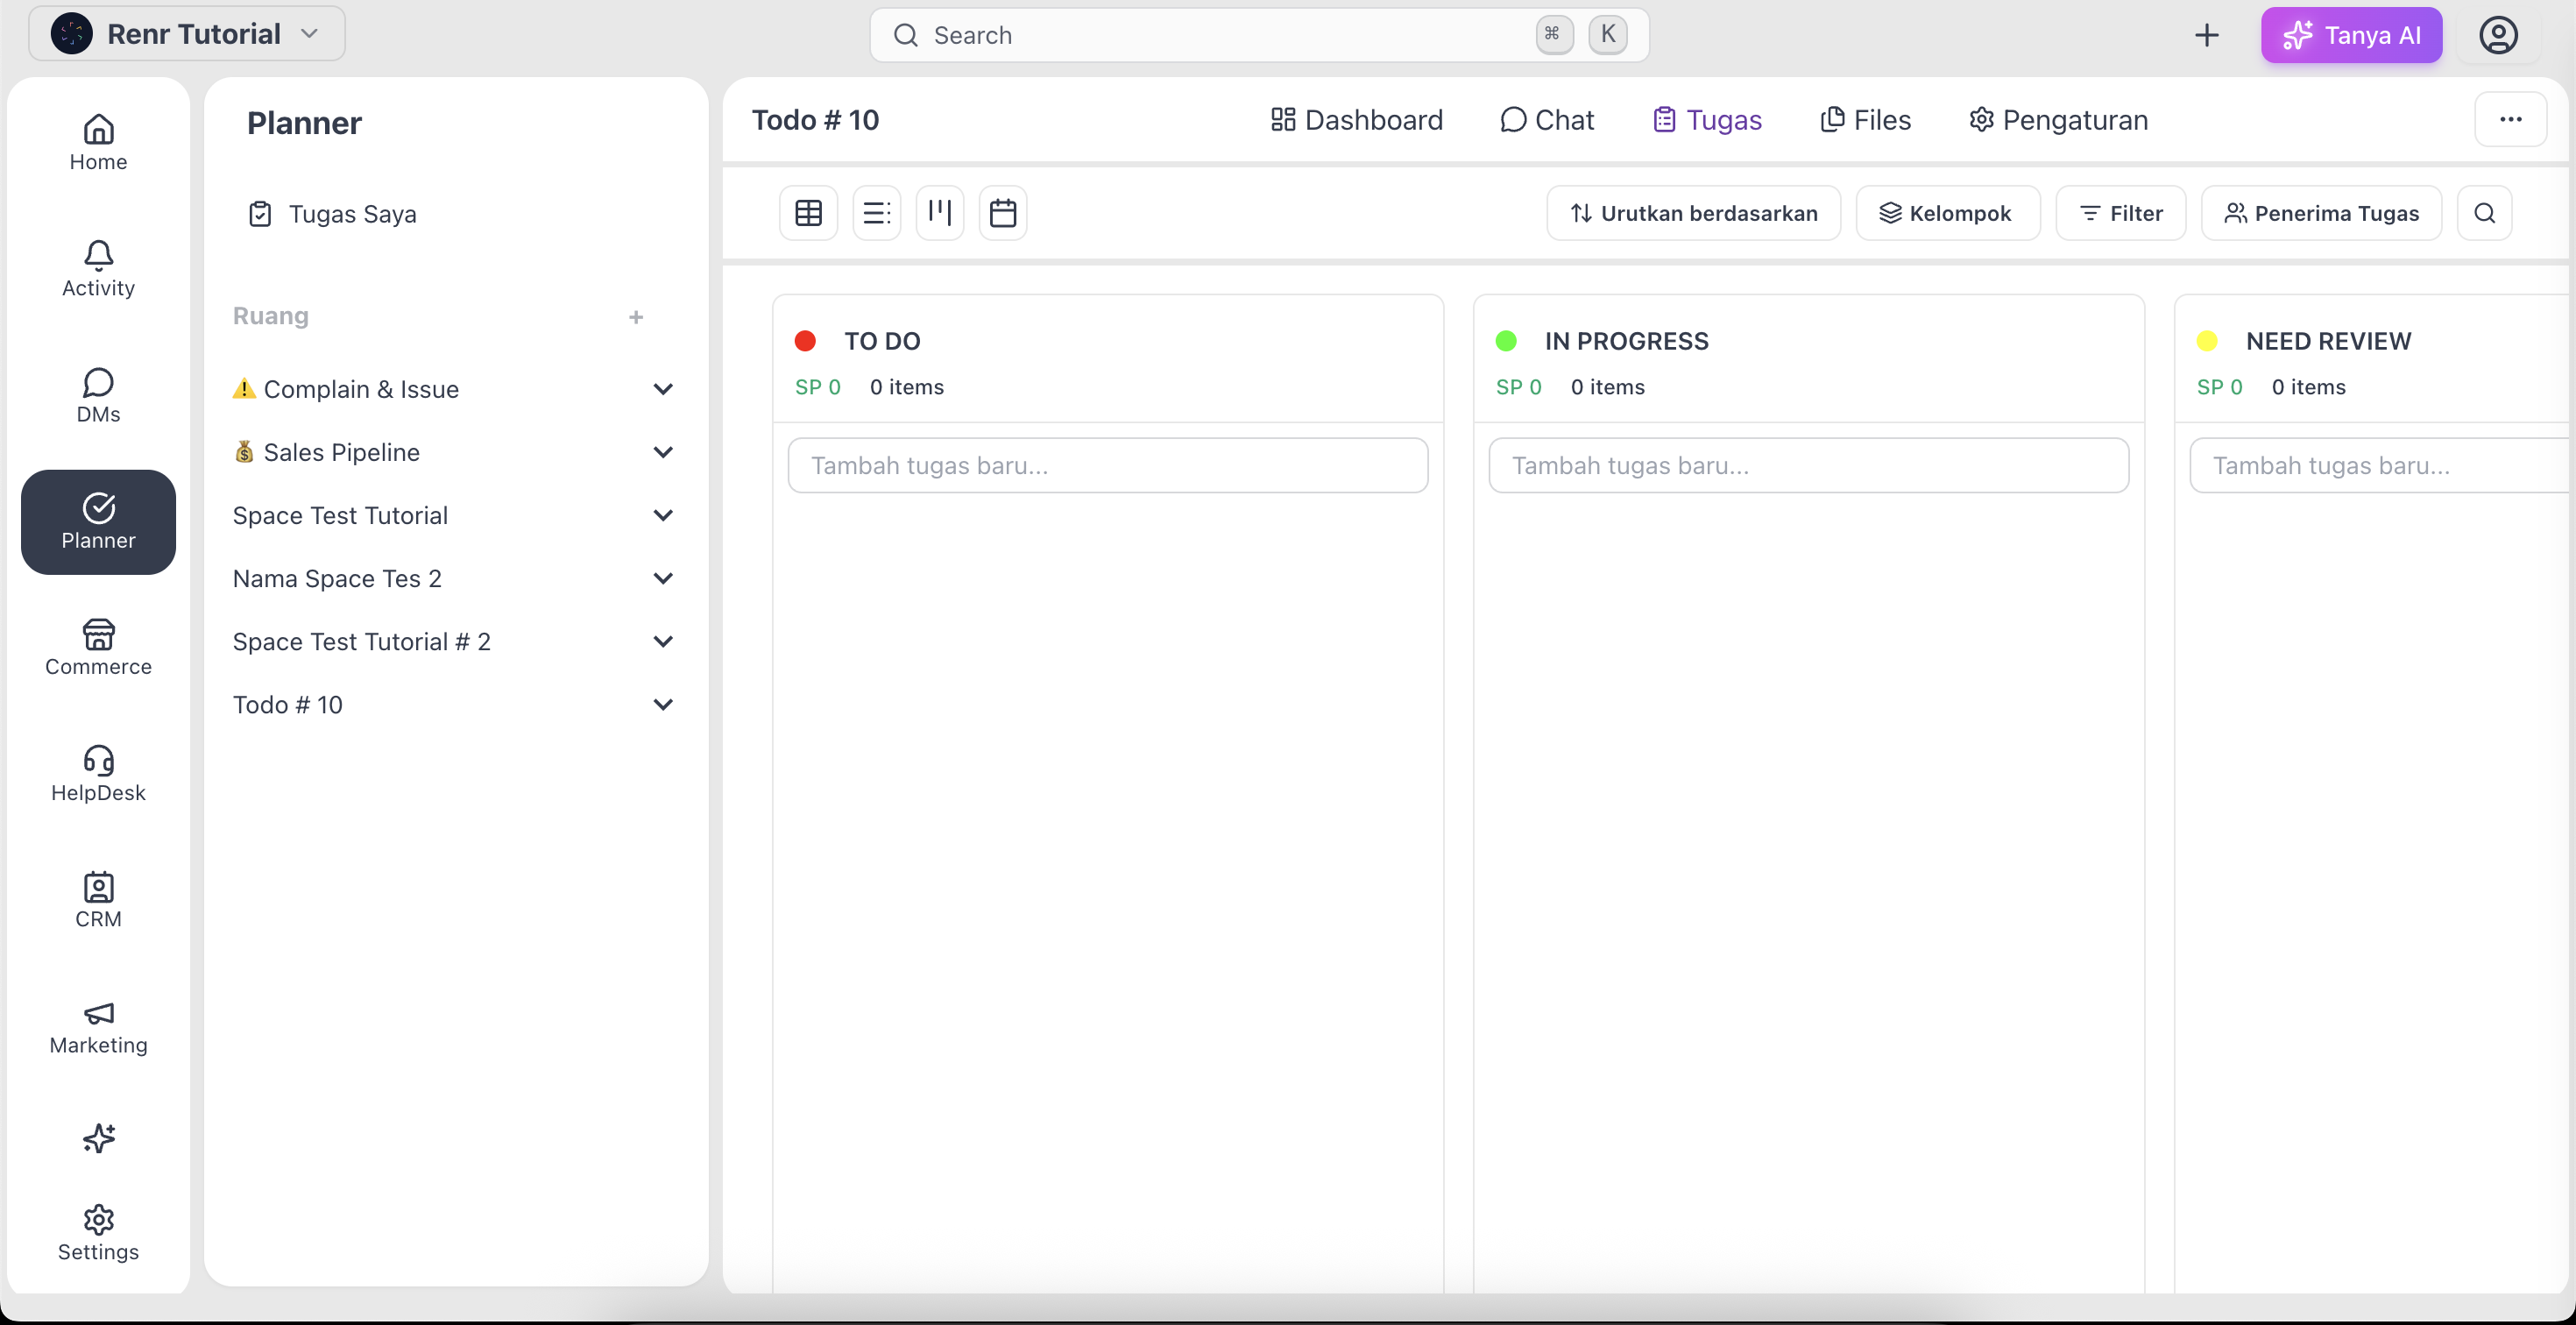
This guide walks you through creating a new Space from scratch. By the end, you'll have an empty space ready for your team with name and type.
What you'll need
- An Owner or Admin role on the workspace where the Space will live.
- A clear idea of what the Space is for — one project, one client, or one team.
Open the Spaces sidebar
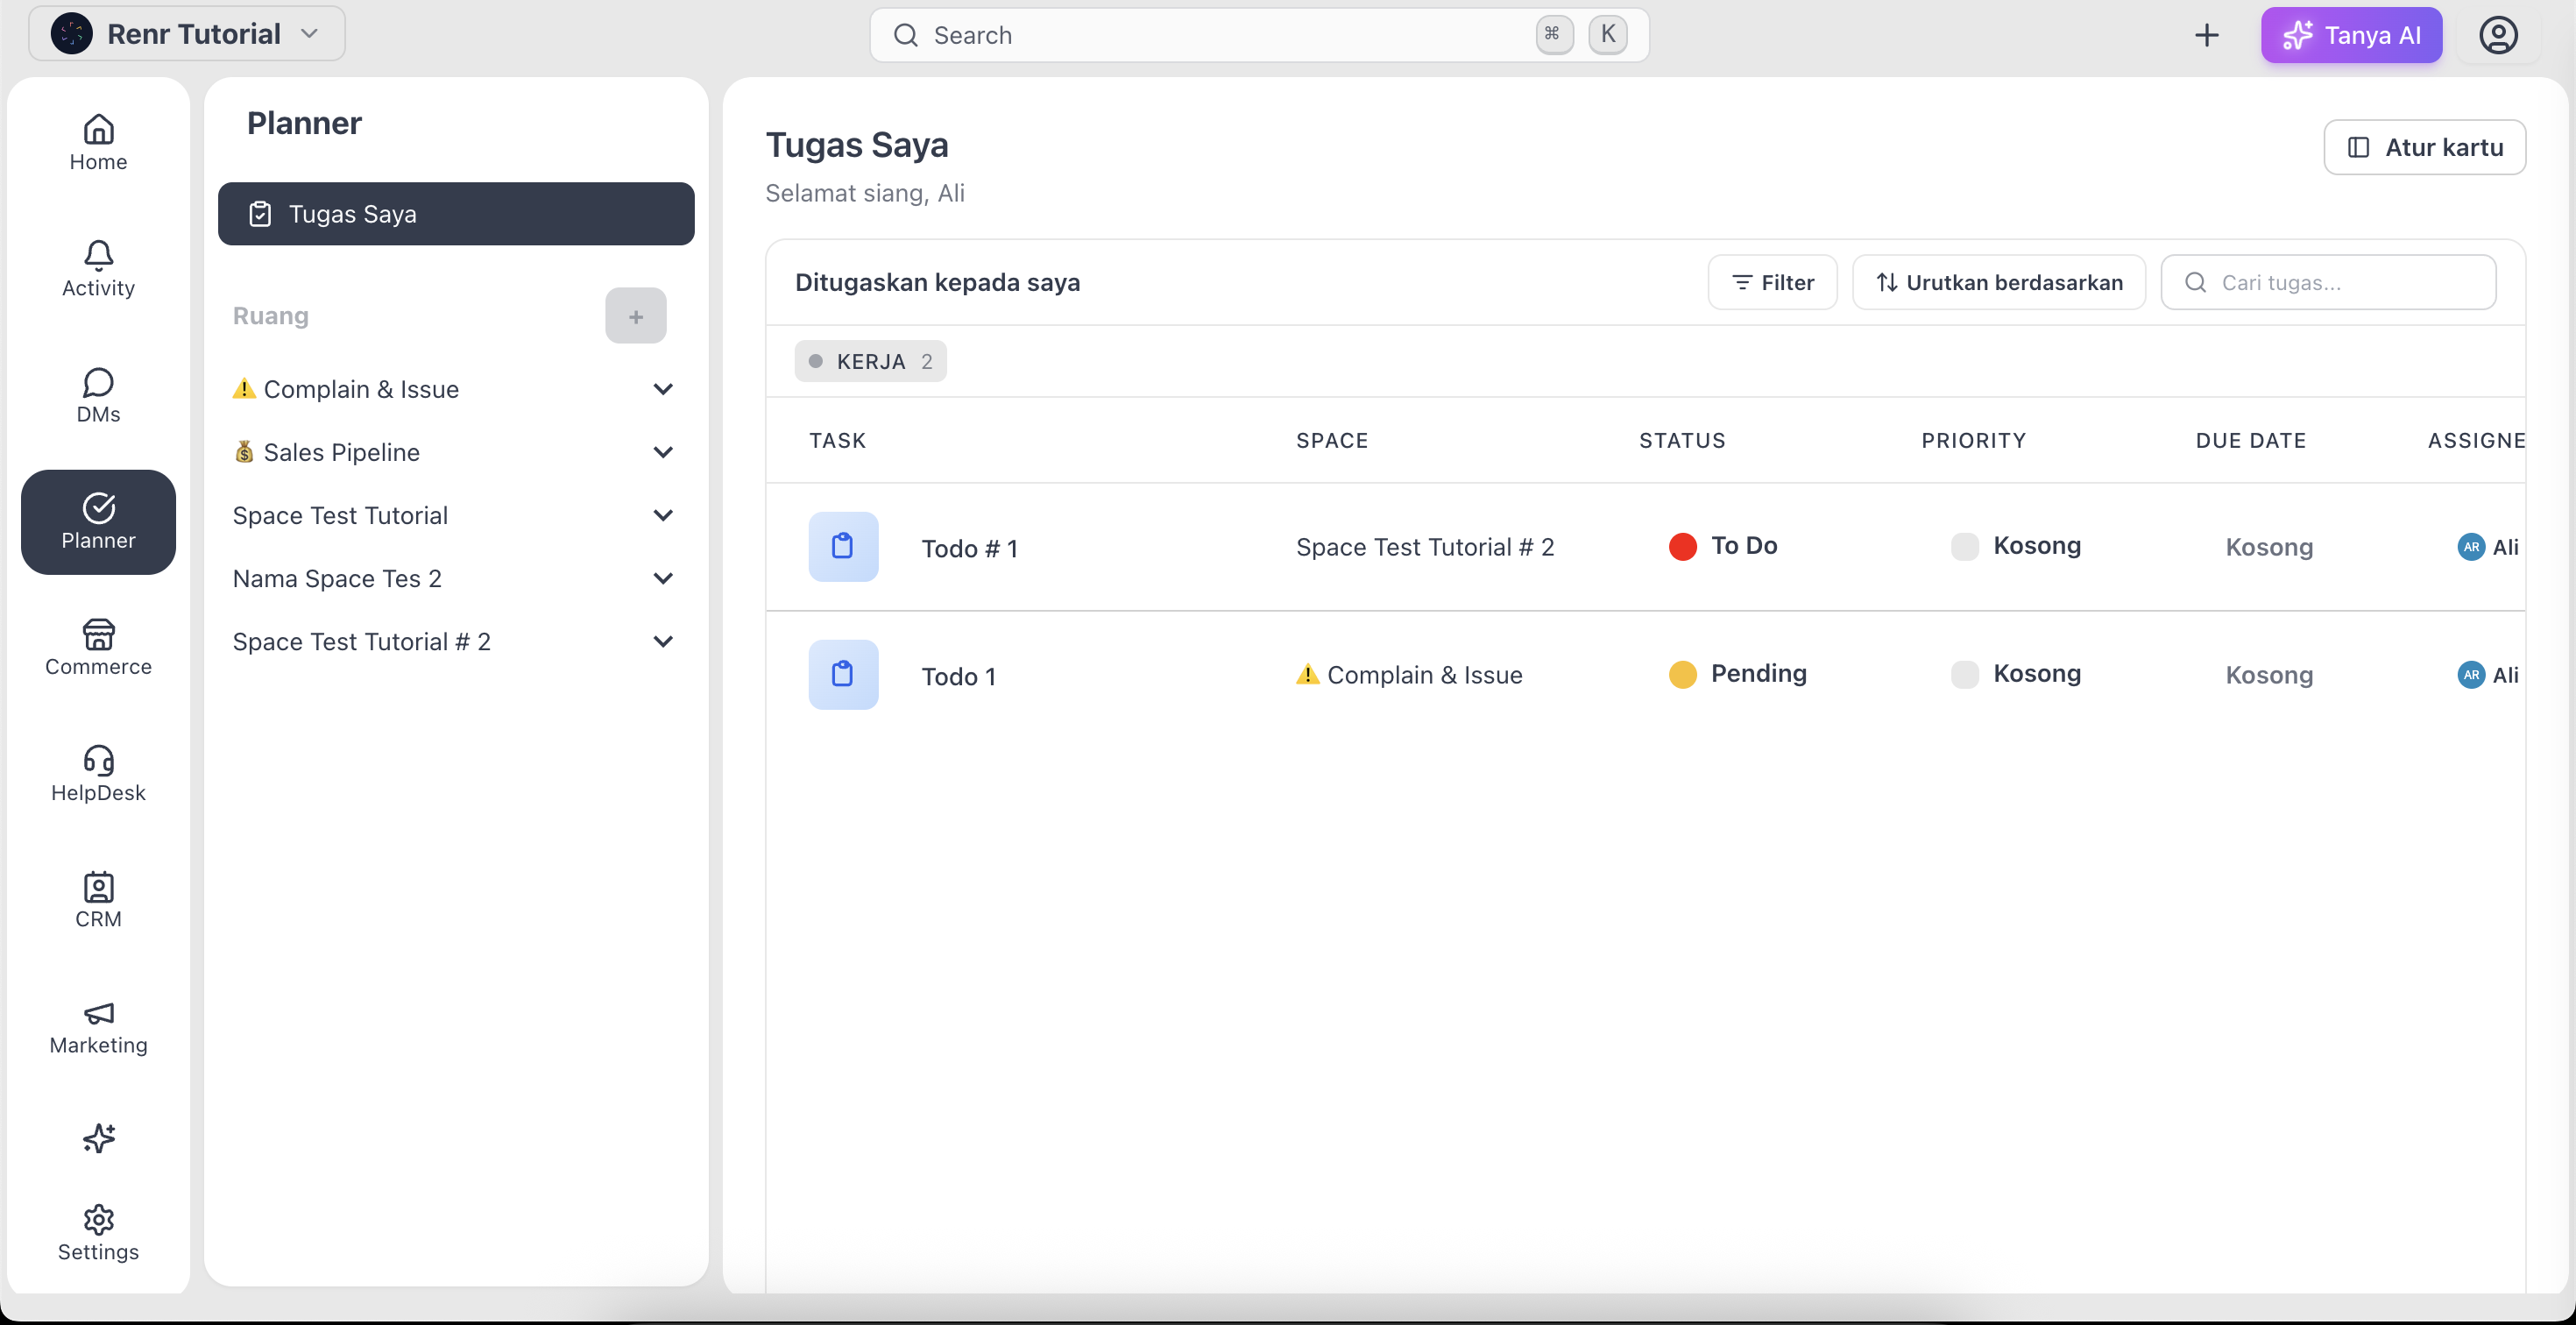
You start every Space the same way: from the Spaces sidebar on the left of the app.
- Open the Planner module from the left sidebar.
- In the Spaces panel, click the + button next to the Spaces heading.
Fill in the Create Space modal
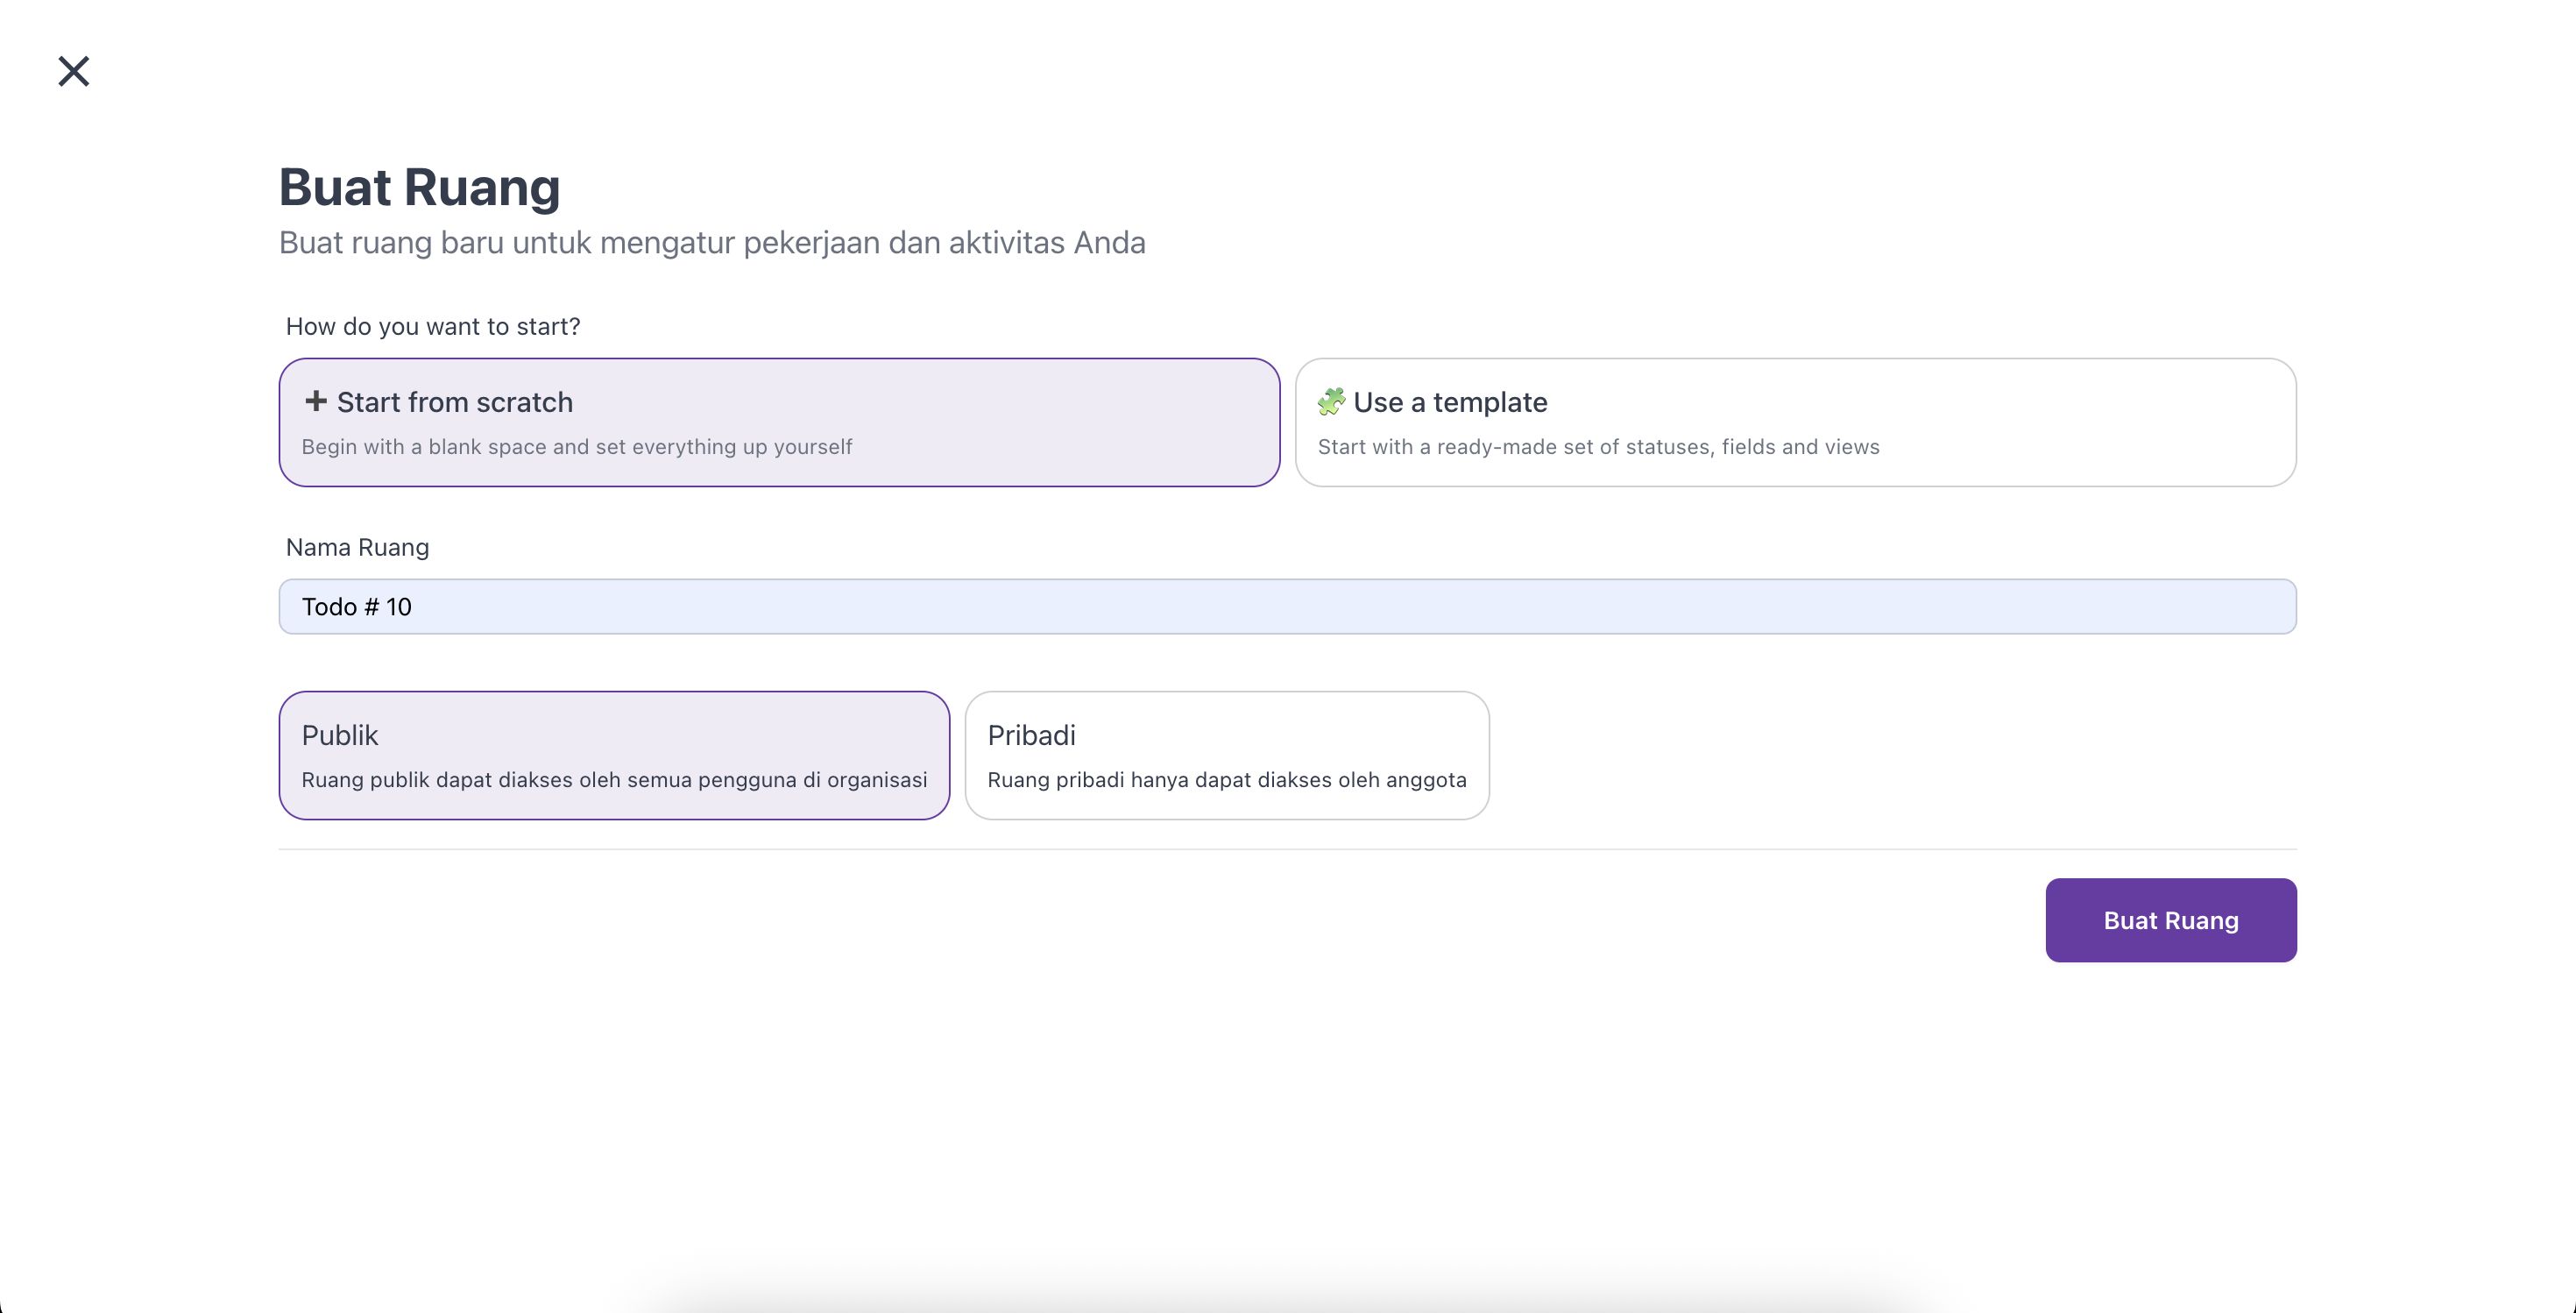
The Create Space modal opens. It asks for two things—a name and a type.
- Enter a name in the Name field.
- Choose the Space type:
- Private — only invited members can access and view this Space.
- Public — all employees in your business can access and view this Space.
Choose how you want to start
Near the top of the Create Space form you will see How do you want to start? with two options:
- ➕ Start from scratch — begin with a blank space and set everything up yourself.
- 🧩 Use a template — start with a ready-made setup. Click Browse Space Templates to pick one, such as IT Helpdesk & Ticketing, Agile Project Management, Agency Management, Sales Pipeline, or HR Onboarding. Each template comes with statuses, views, and sample tasks already in place. After choosing, use Change if you want to swap to a different one.
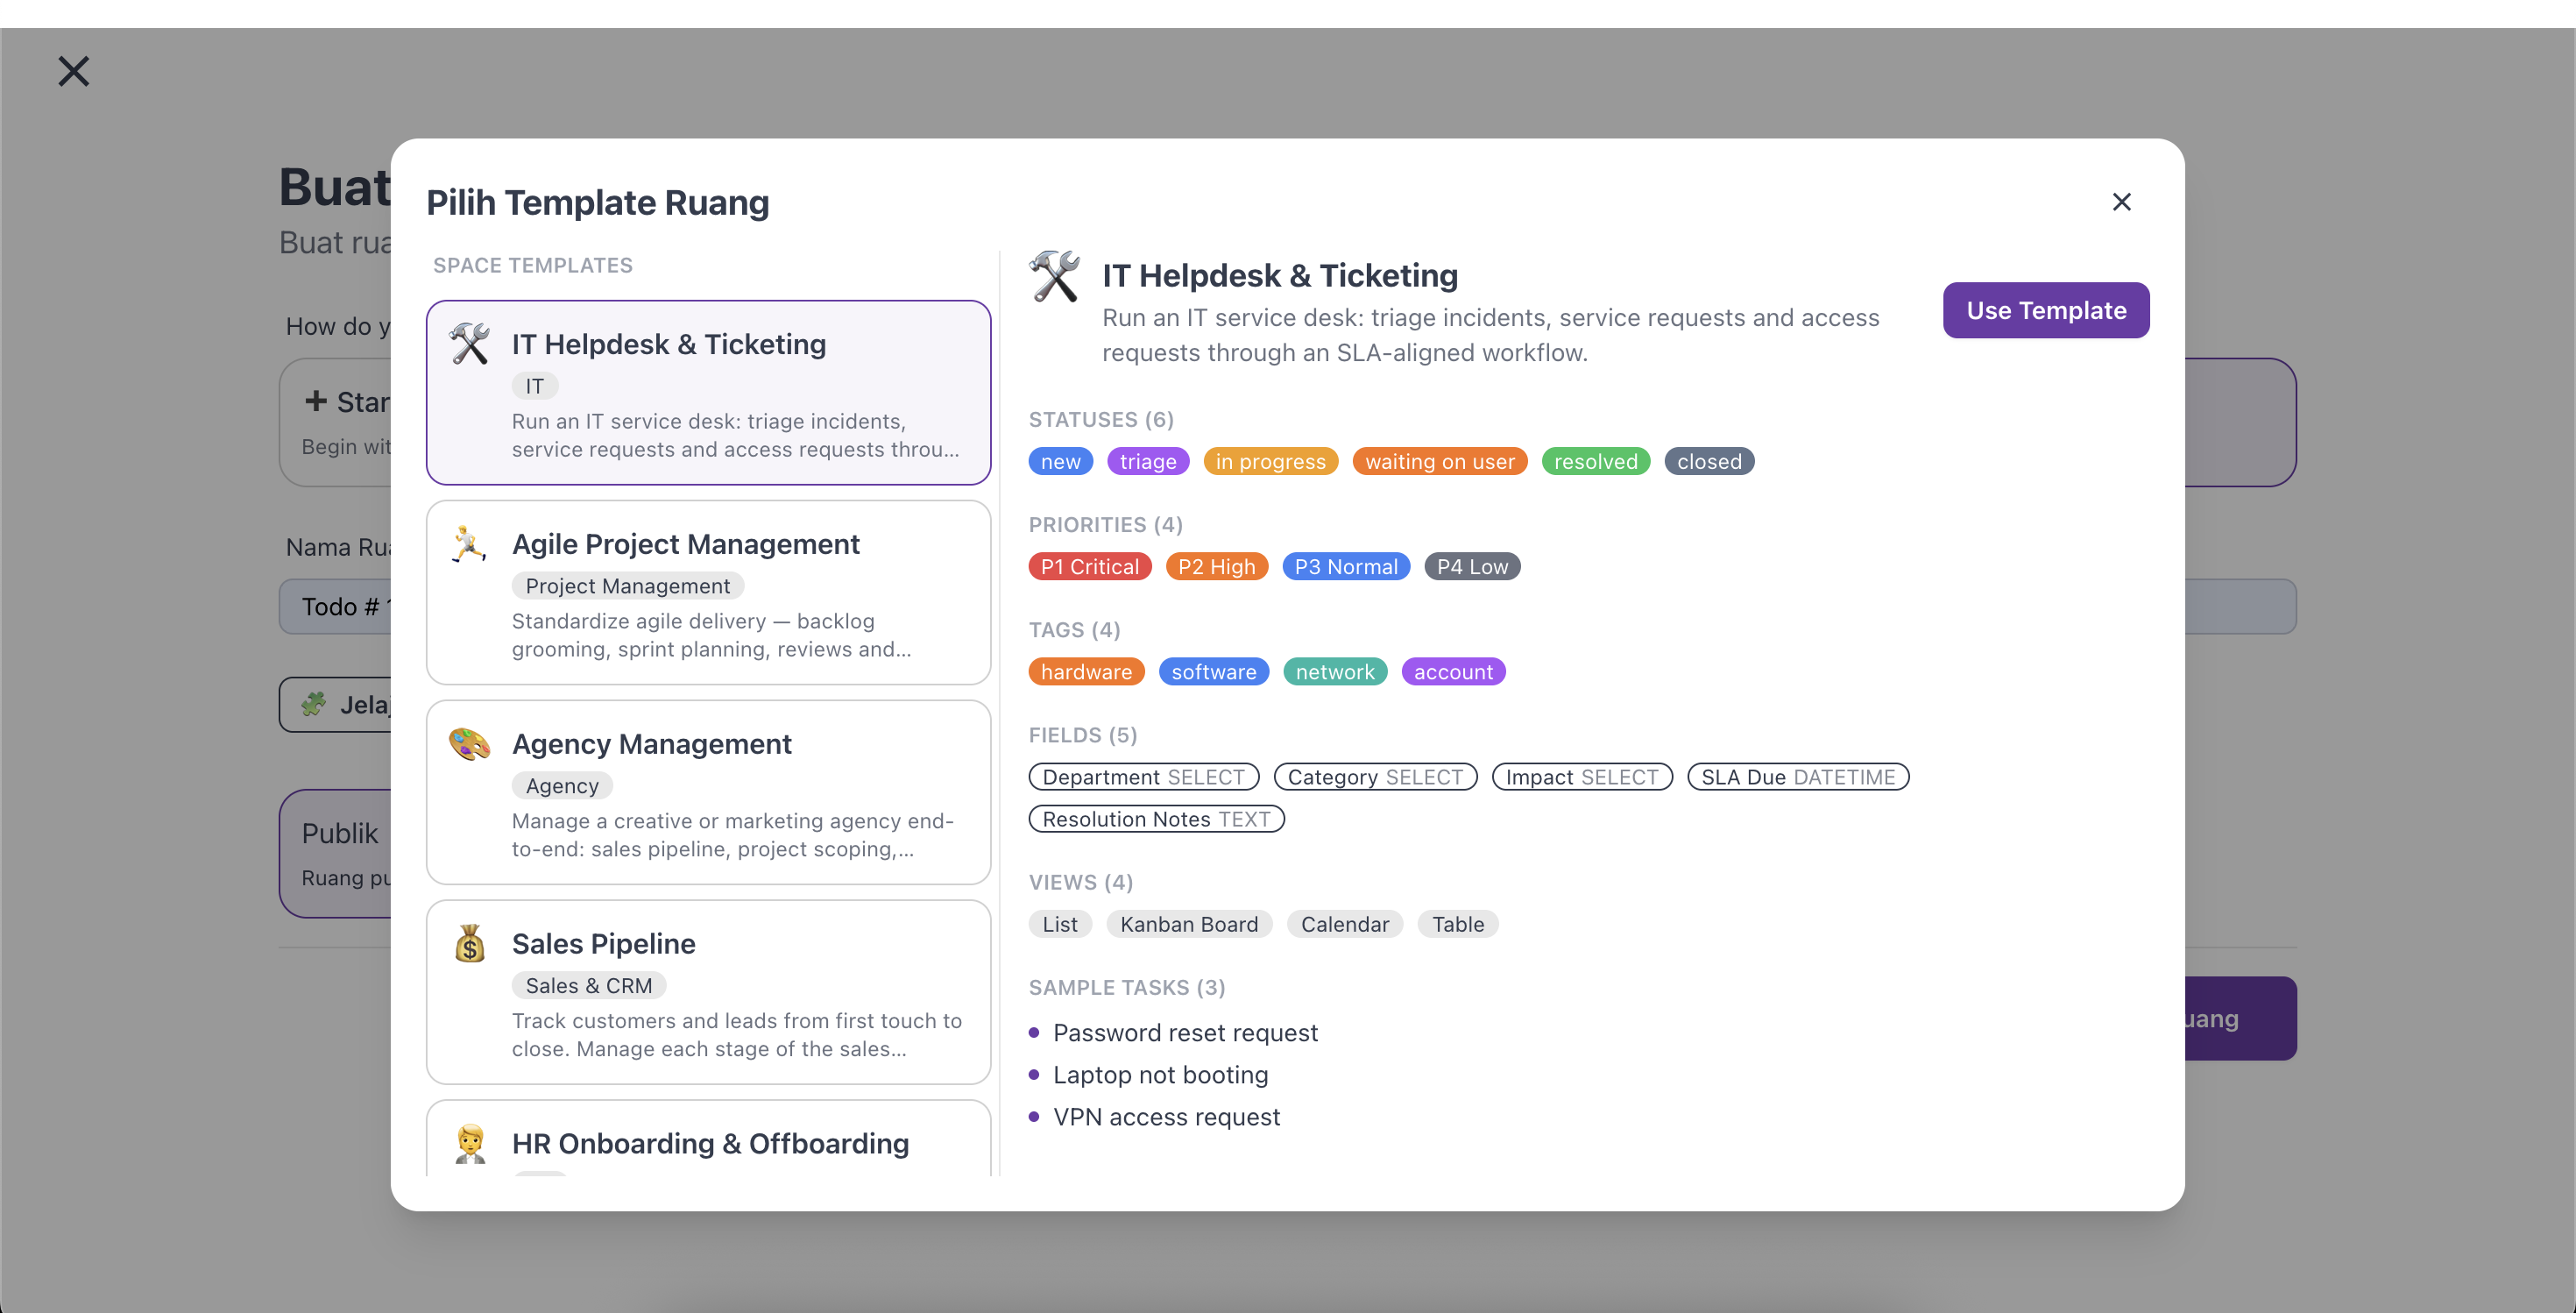
Tip: Templates are the fastest way to get going — pick the one closest to your work, then fine-tune it later in Space settings.
Click Create.
- Your space is created, and you'll land on its empty kanban task management, ready for the next step.