.png)
Your profile is where you manage the personal information Renr shows across the platform — your name, email address, and profile picture. This guide walks you through finding your profile settings, reviewing your details, and saving changes.
Open your profile settings
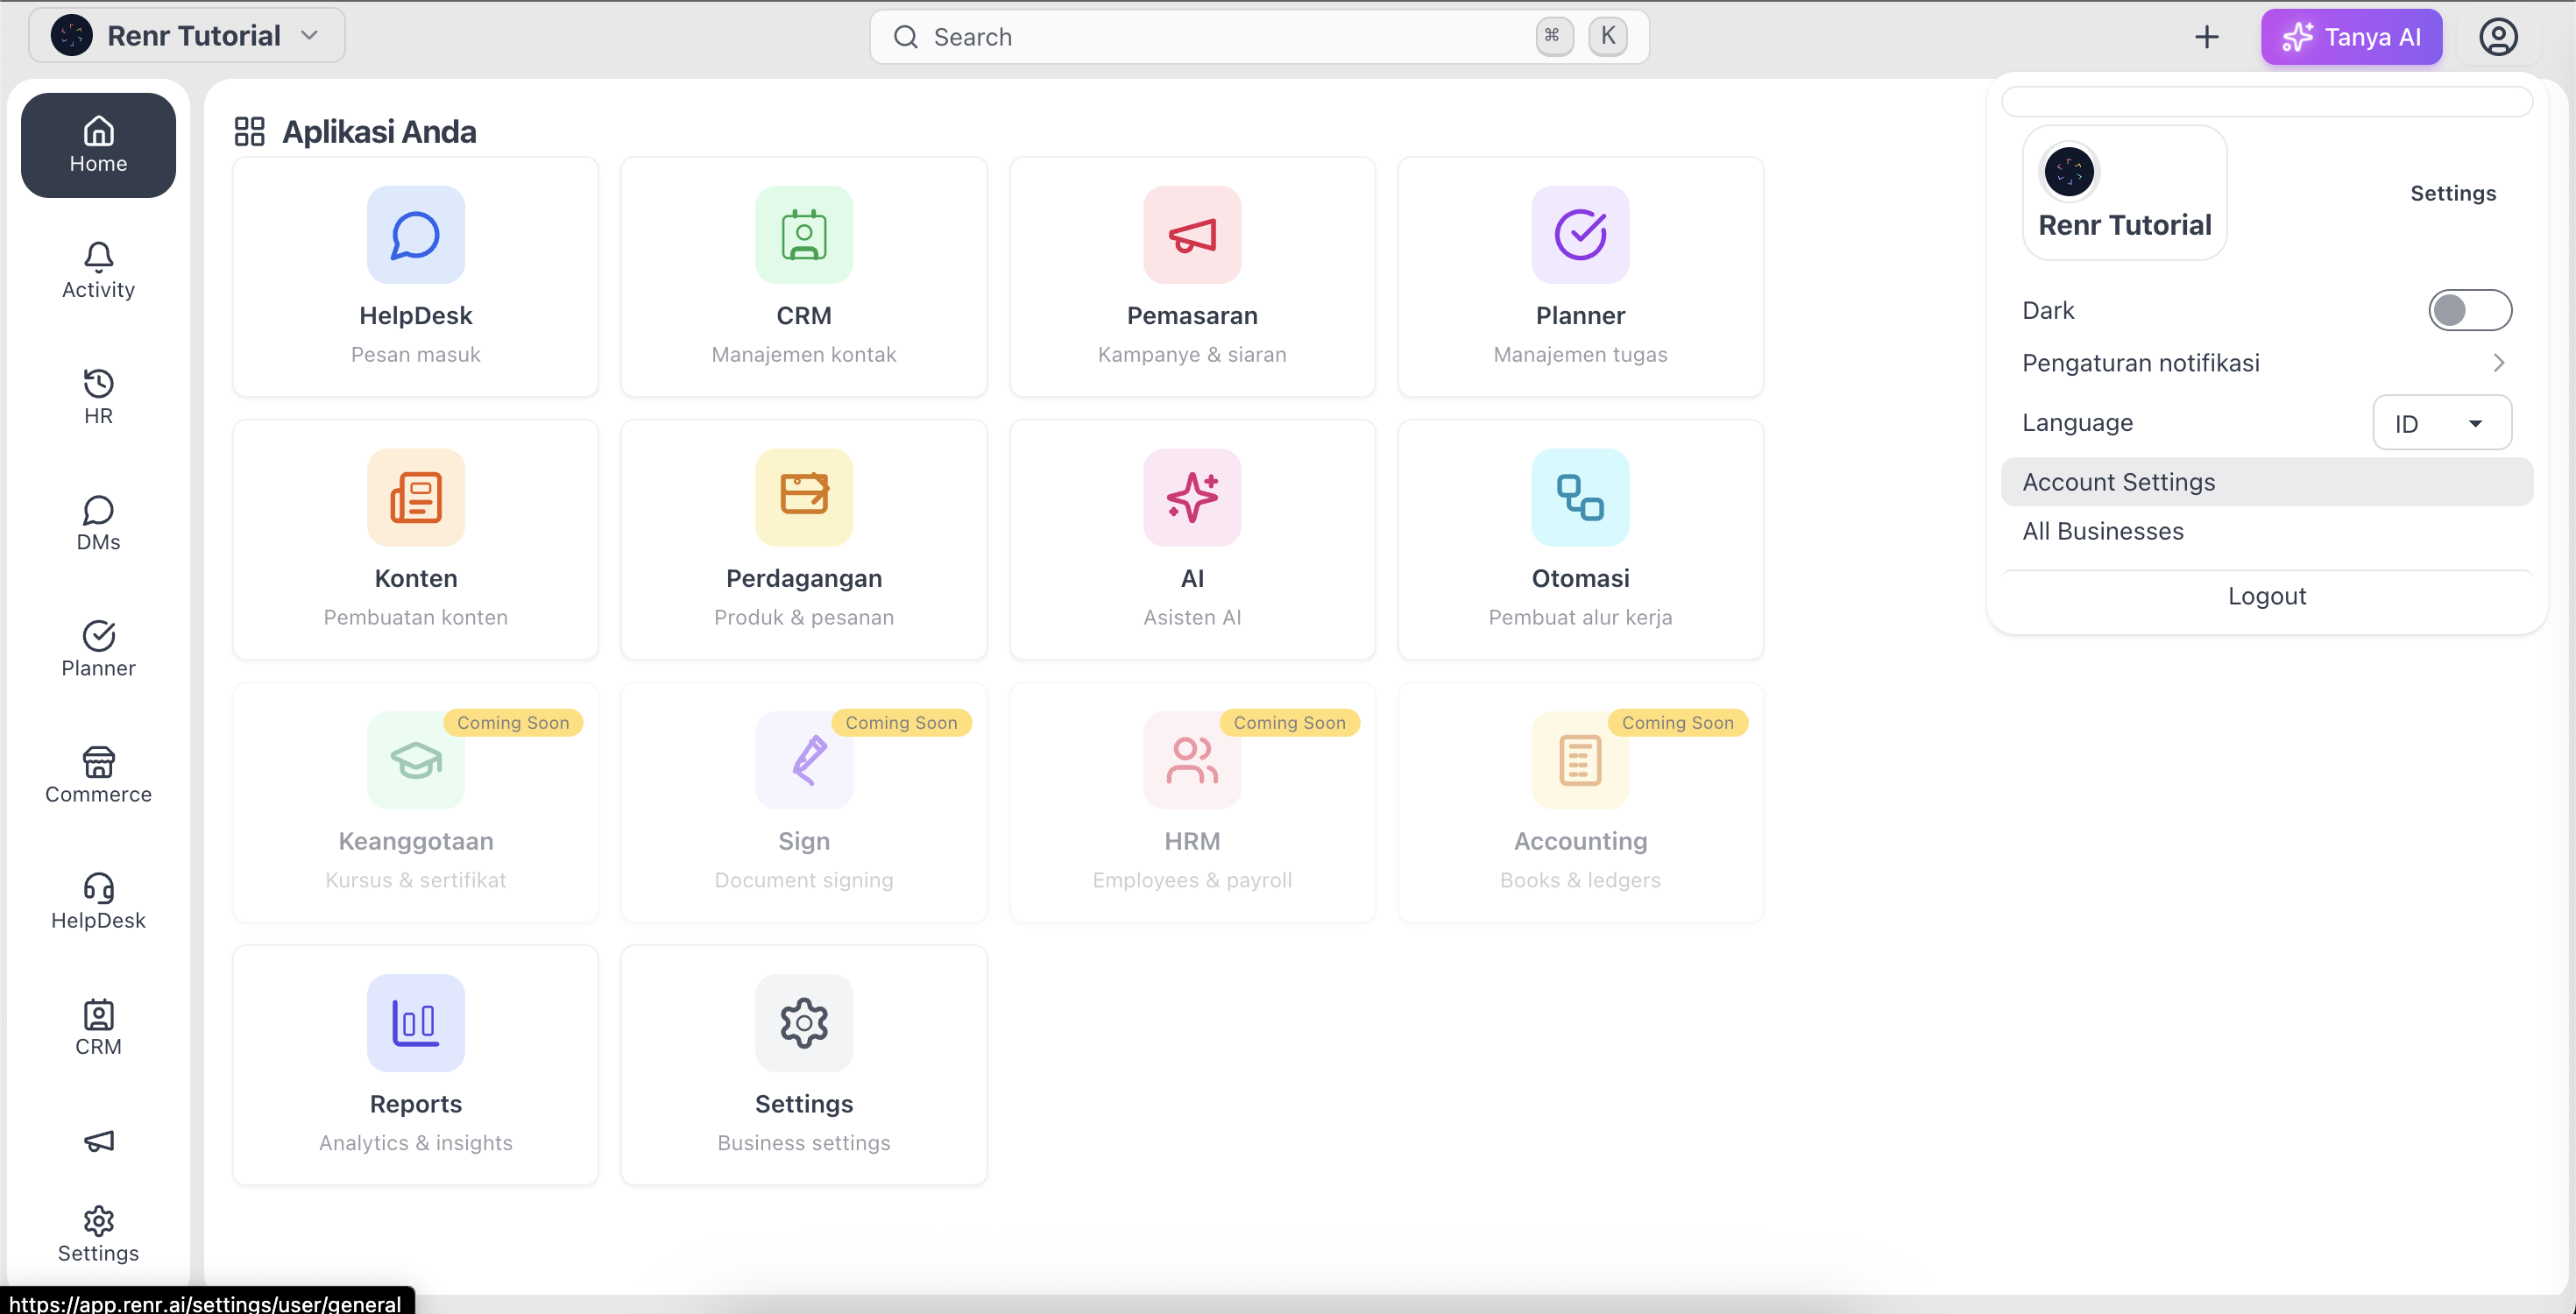
- Click your profile picture in the top-right corner of the header to open the account menu.
- Select Settings to open the User Profile area.
- You'll land on the General tab, headed Personal information. This is where you manage your user profile information.
Note: The left sidebar has three tabs — General, Signing In, and Device Activity. Your personal details live under General.
Review your personal information
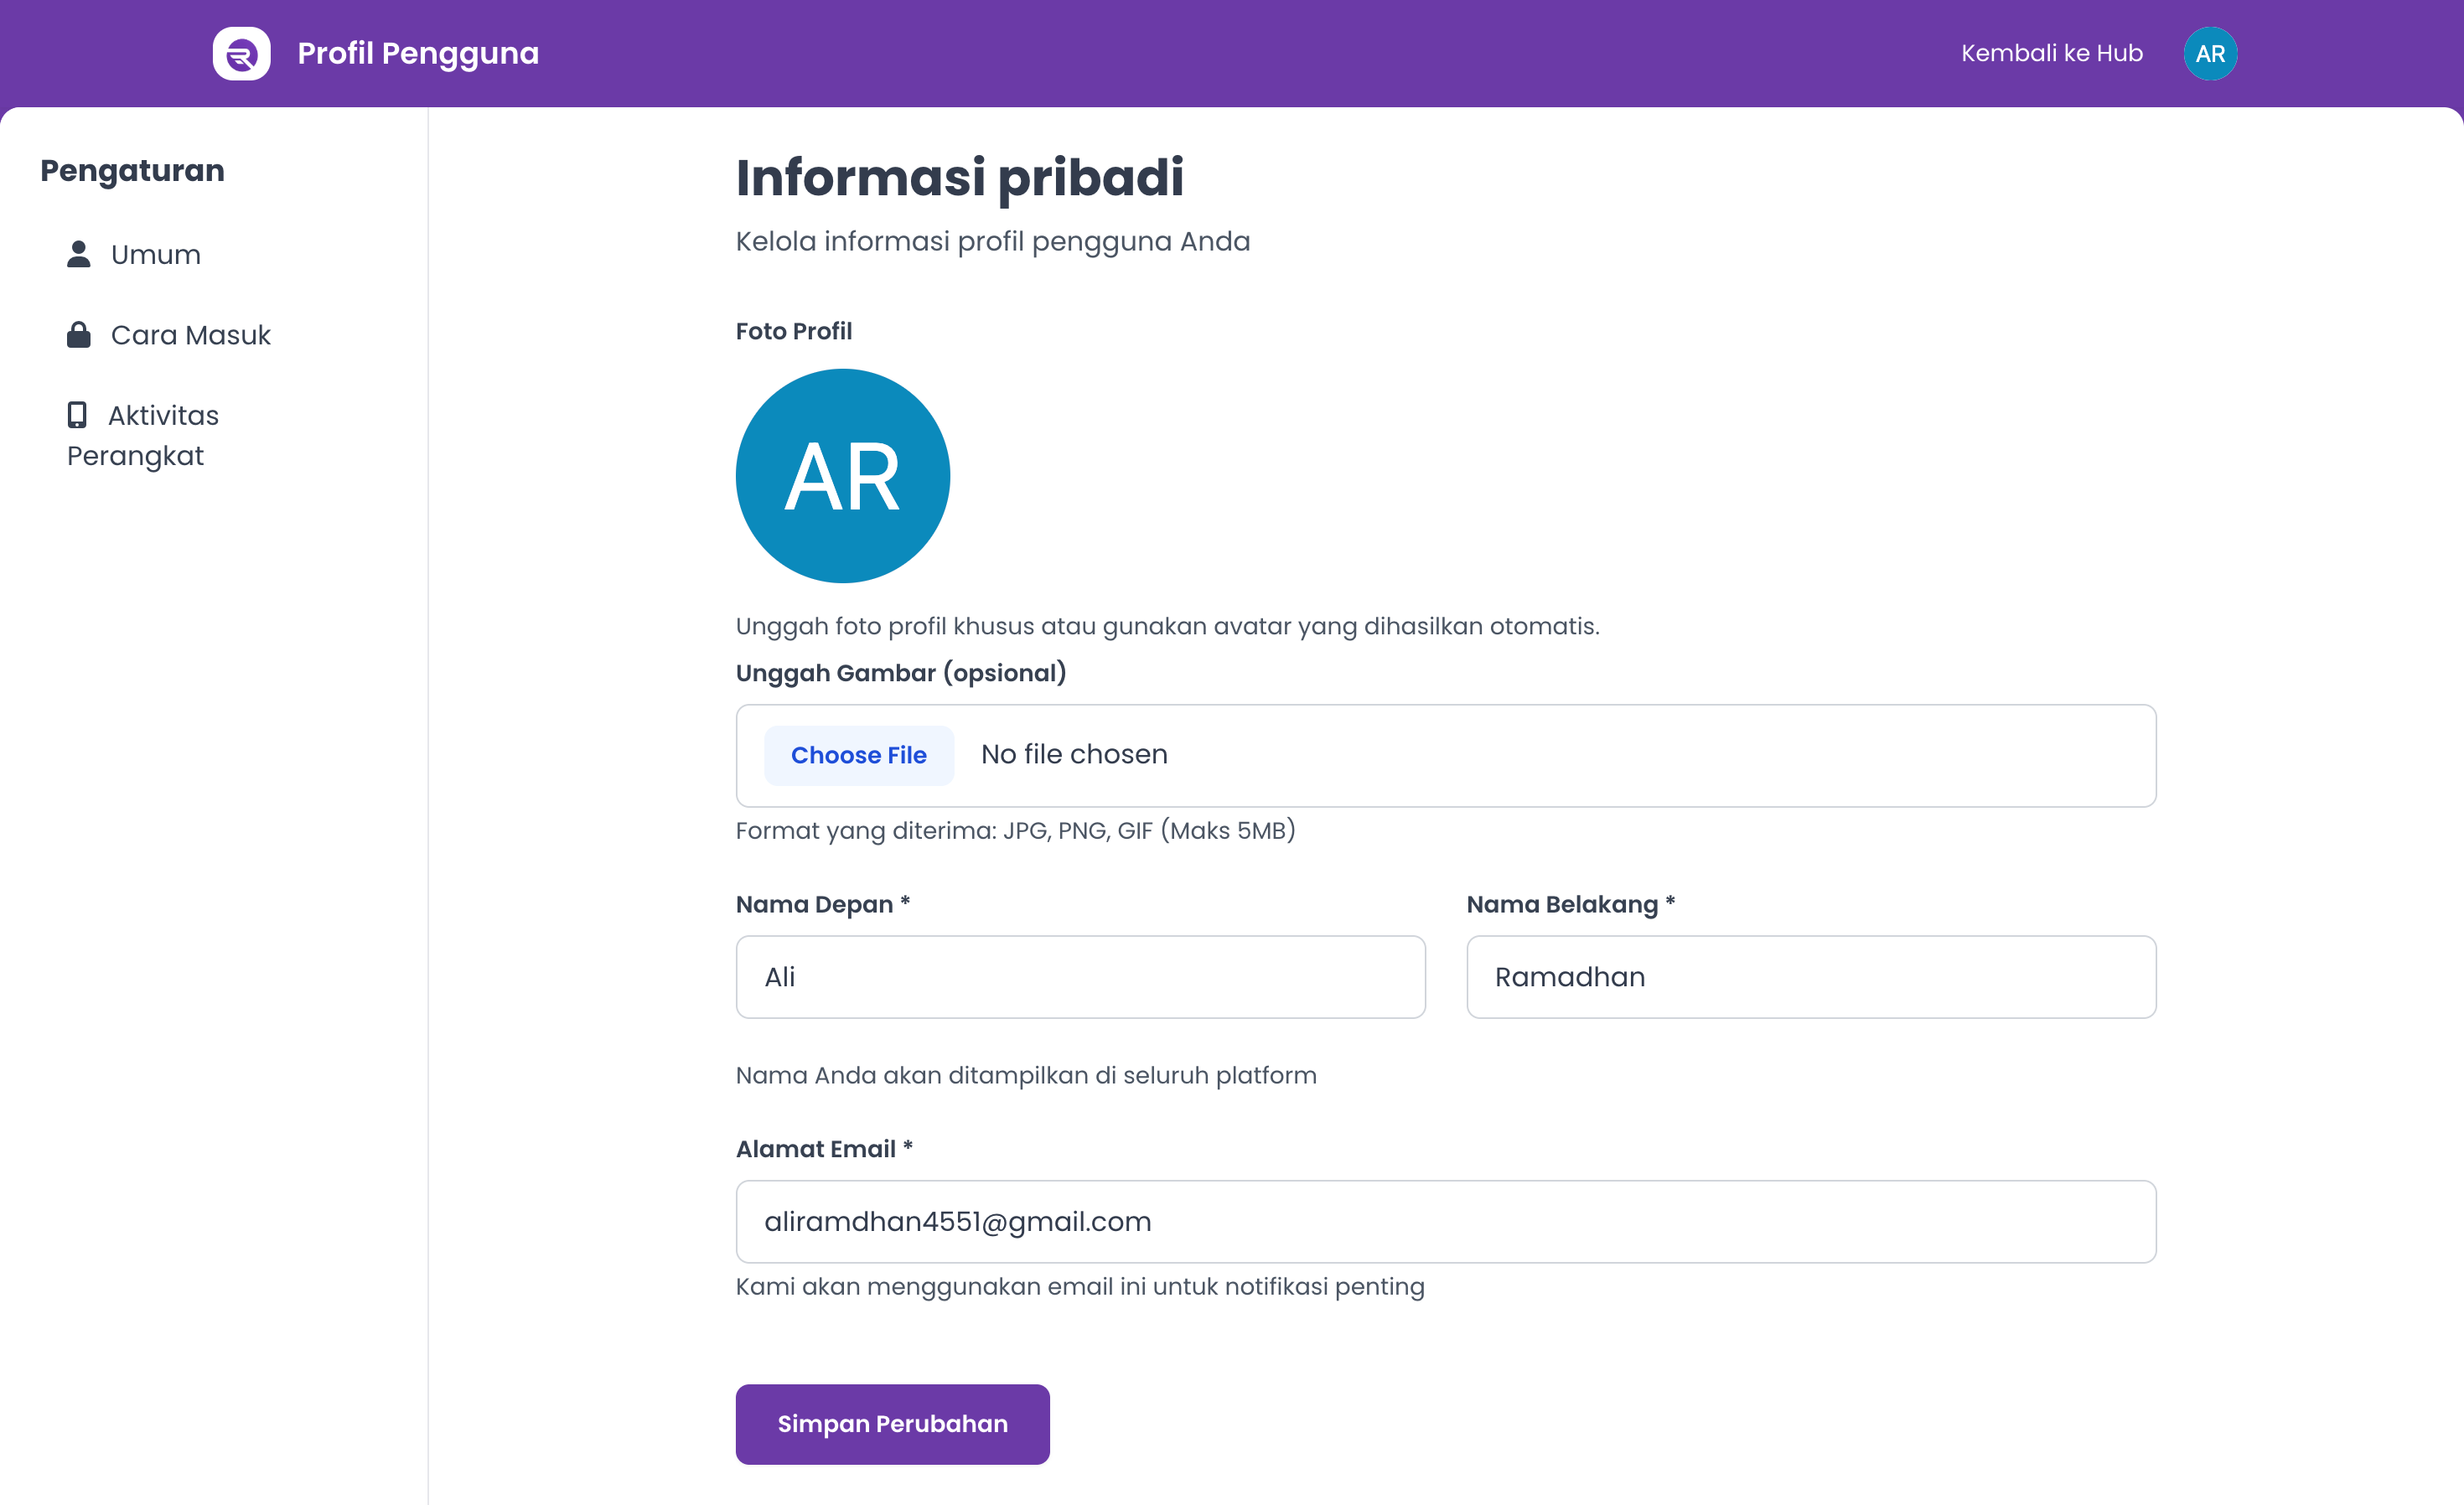
On the General tab you'll see everything currently saved to your profile:
- Profile Picture — your custom photo, or an auto-generated avatar if you haven't uploaded one.
- First Name and Last Name — the name shown across the platform.
- Email Address — the address Renr uses for important notifications.
Take a moment to check that everything is accurate before making changes.
Edit your details
- Click into the First Name, Last Name, or Email Address field and type your new value.
- When everything looks right, click Save Changes.
- A confirmation message — Profile updated successfully! — appears once your changes are saved.
Note: First Name, Last Name, and Email Address are all required, so none of these fields can be left blank.
Update your profile picture
You can upload a custom profile picture or stick with the auto-generated avatar.
- Under Profile Picture, click Upload Picture (optional) and choose an image from your device.
- Click Save Changes to apply your new picture.
Tip: Accepted formats are JPG, PNG, and GIF, up to a maximum of 5 MB.
More account settings
- Signing In — set up your password and two-factor authentication.
- Device Activity — review where you're signed in and sign out of any unfamiliar devices.