Your team is everyone who works inside your business in Omni. As the business owner, you can invite teammates by email, decide exactly what each person can access, and remove anyone who no longer needs access — all from one place. This guide walks you through it.
Before you start
- You'll need to be the owner of the business — Team Management is owner-only.
- Have the email address of each teammate you want to invite.
- On the free plan you can have up to 2 team members, including yourself. Pending invitations count toward this limit. To add more, upgrade your plan.
Open Team Management
From your business, go to Settings → Team Management. You'll see two sections: Team Members (people already in your business) and Pending Invitations (invites you've sent that haven't been accepted yet).
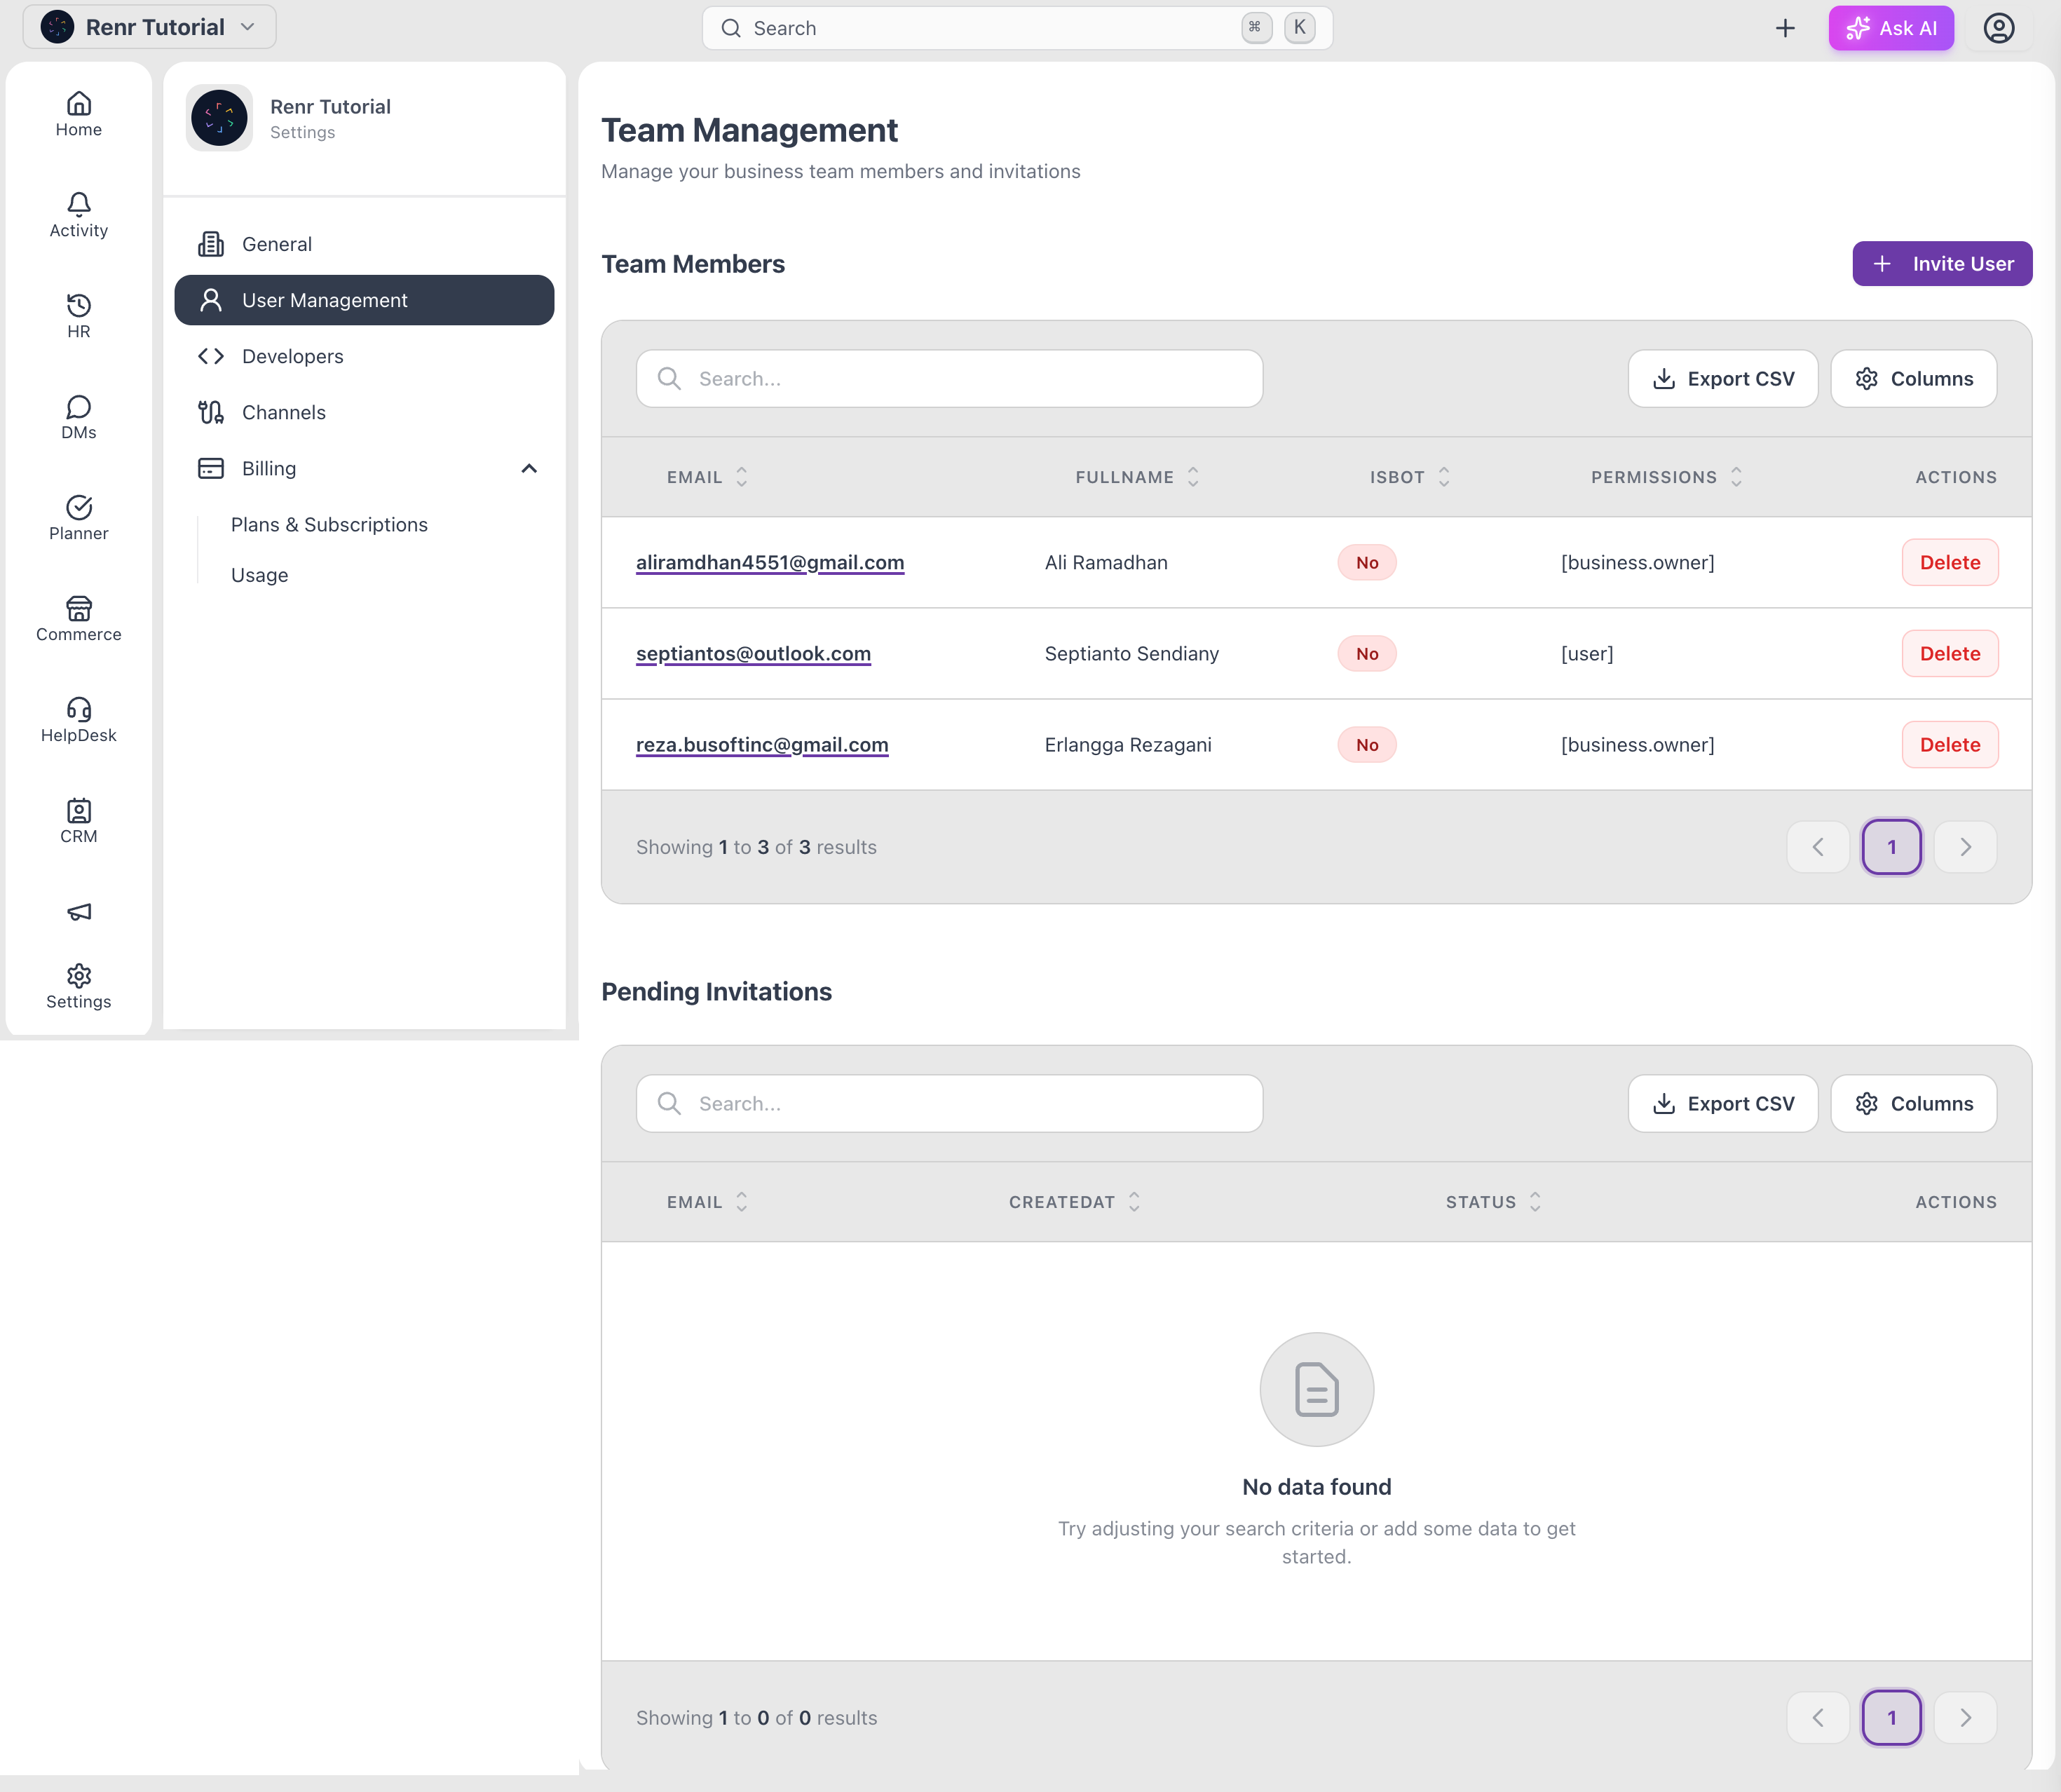
Invite a teammate
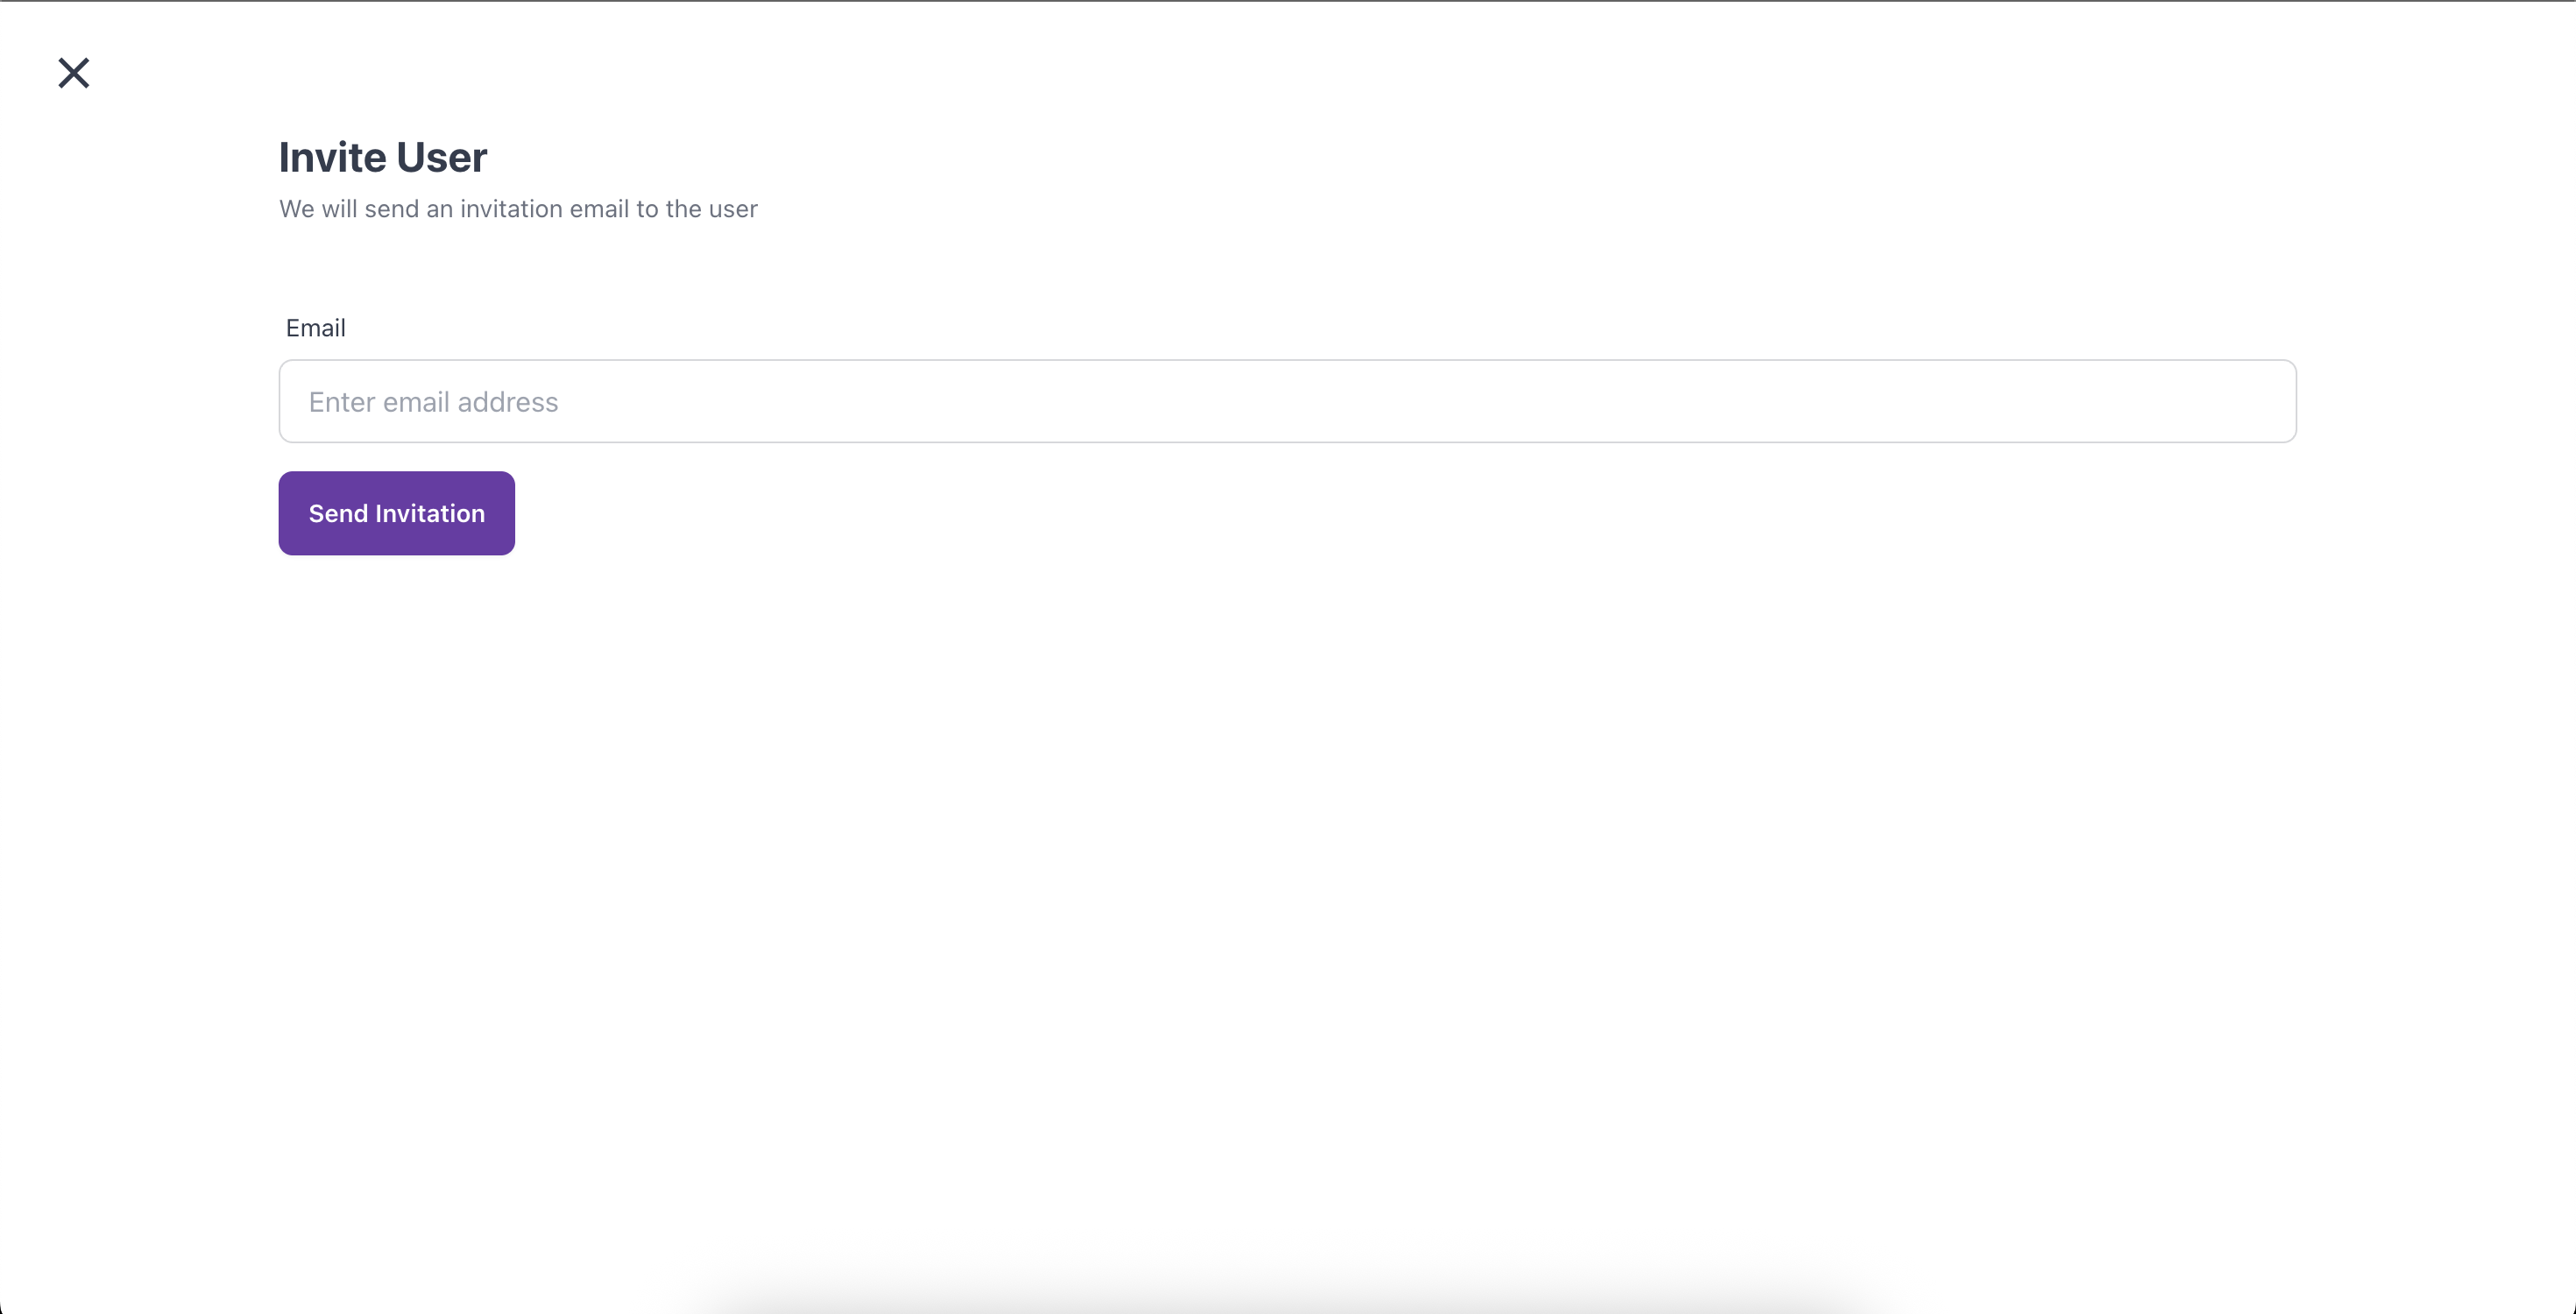
- Click Invite User.
- In the Invite User dialog, type the teammate's email address.
- Click Send Invitation.
Omni emails the invitation and adds a row to Pending Invitations with the status Pending. Once your teammate accepts, they move into the Team Members list.
Note: An invitation stays valid for 30 days. Sending a new invite to the same address replaces the previous one.
Set what a teammate can access
Permissions decide what each member can see and do across your business modules.
- In the Team Members list, click the teammate you want to manage.
- On the Permissions tab, tick the boxes for what they should be able to do. Permissions are grouped by module — such as Members, CRM, Planner, and more — so you can grant access feature by feature.
- Click Update Permissions to save.
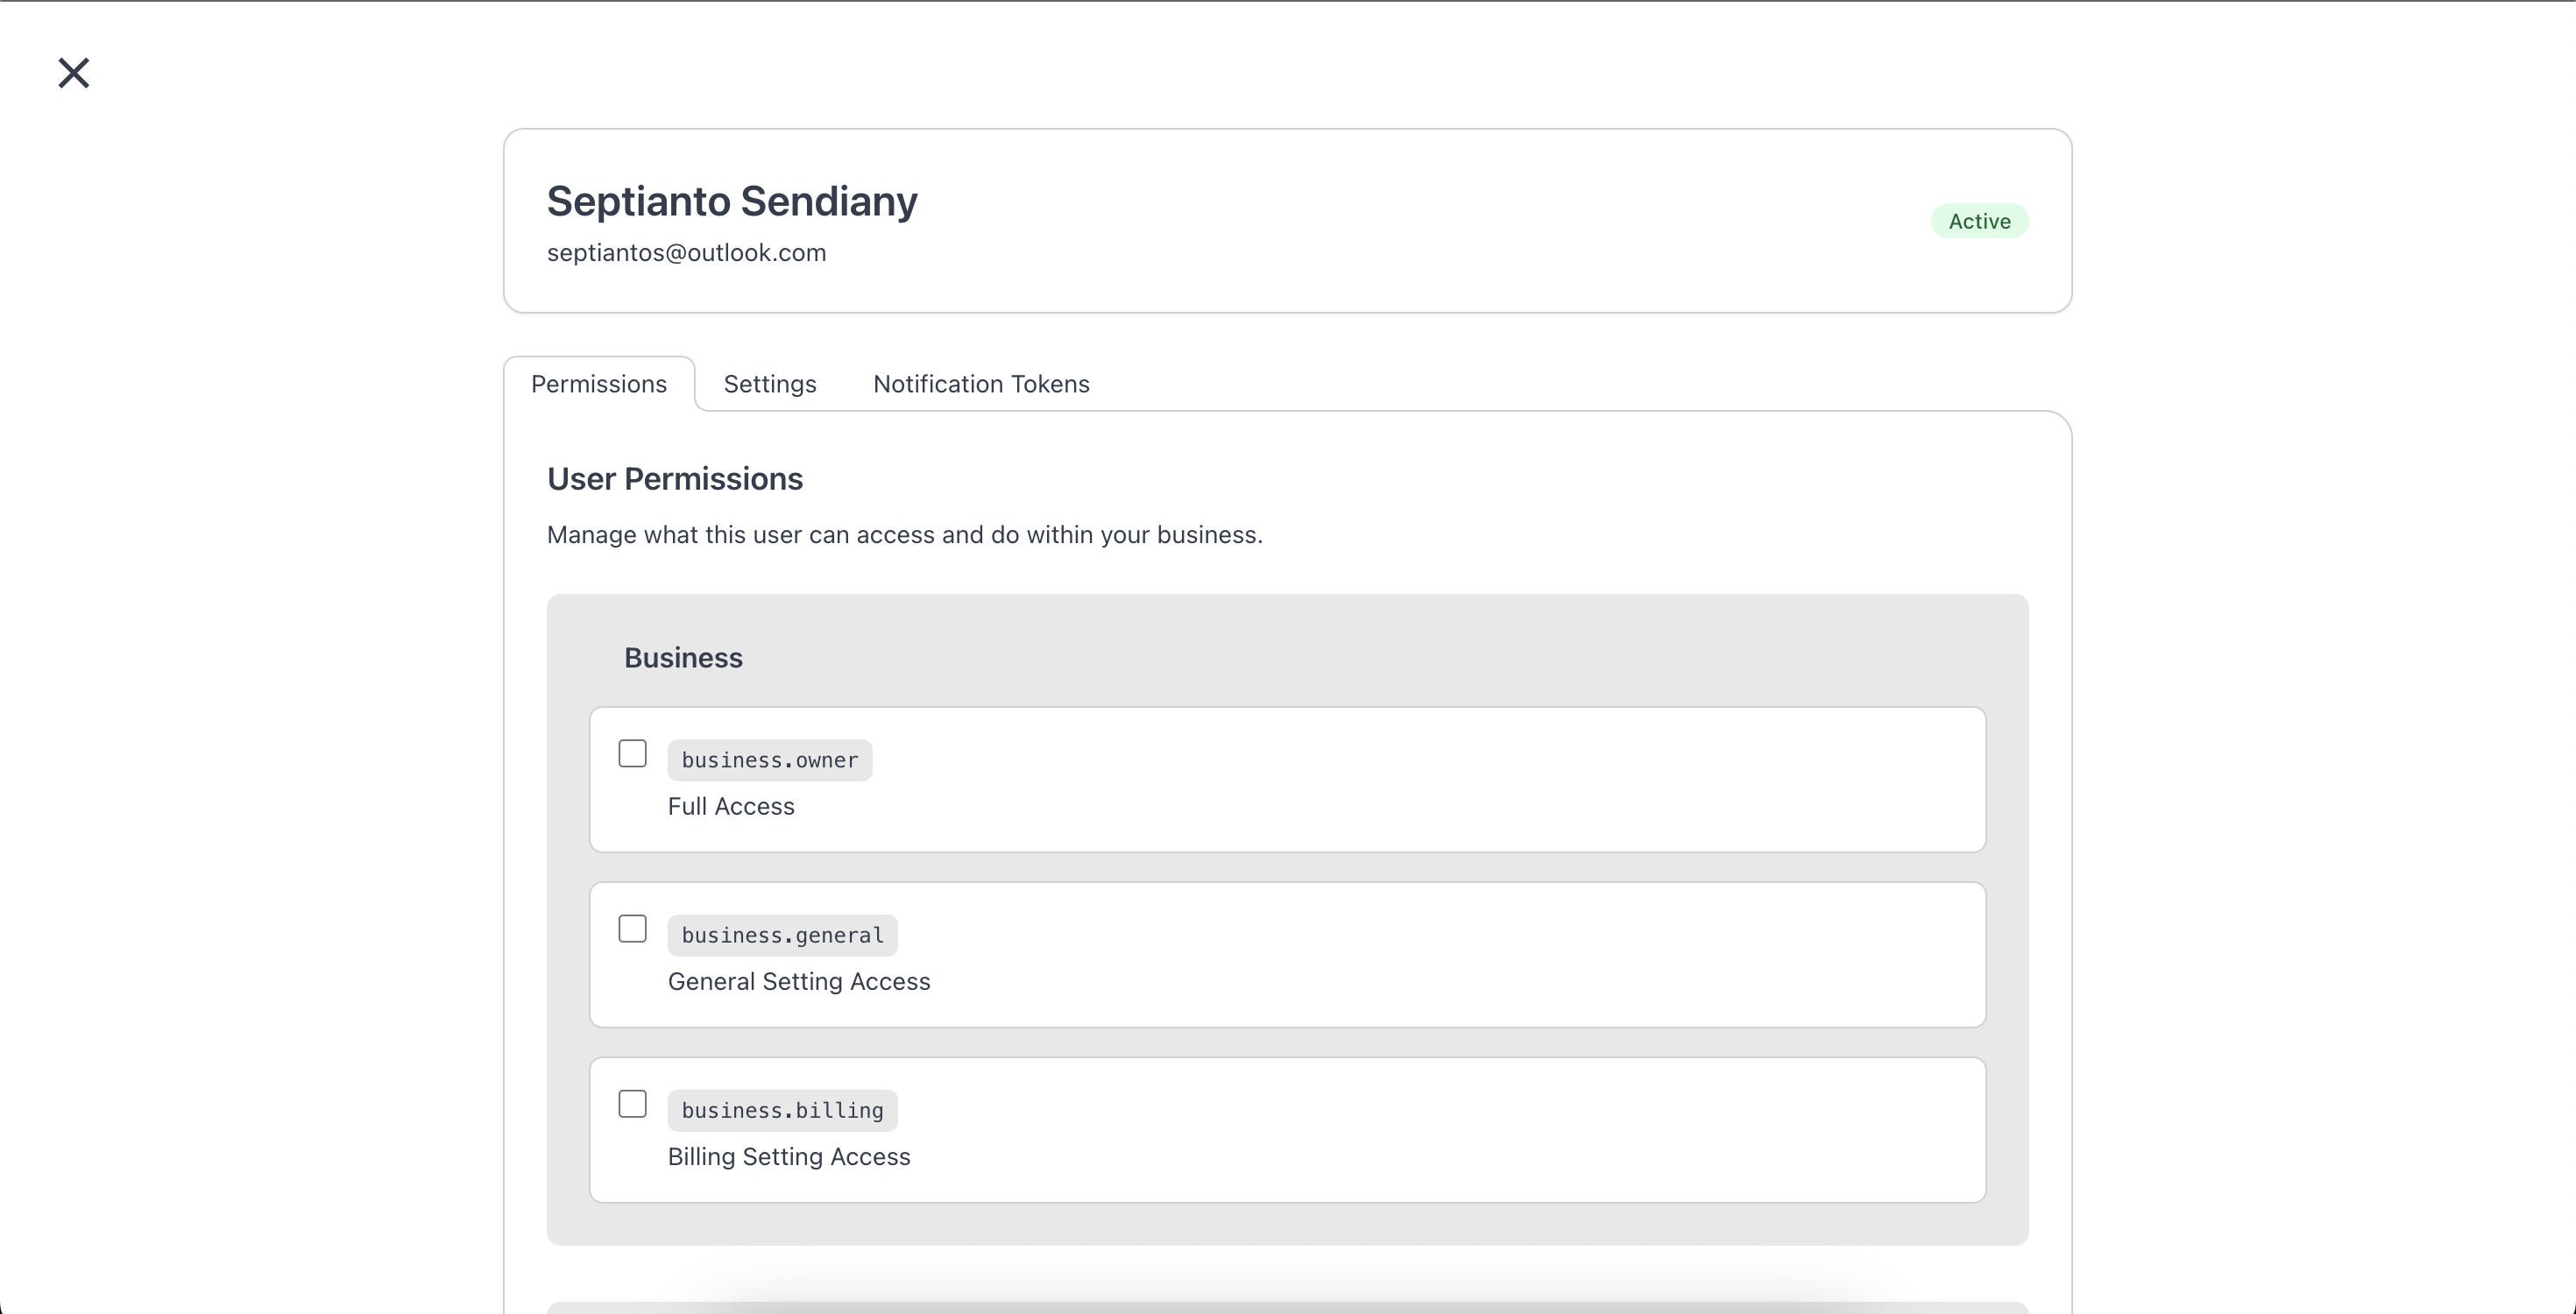
What each permission lets a teammate do
Permissions are organised by module. Tick a checkbox to grant that permission; leave it unticked to withhold it. The main groups are:
Business
- Full Access — complete administrative control over every business setting and feature (the same access as the business owner).
- General Setting Access — view and edit general business information.
- Billing Setting Access — manage payment methods, plans, and invoices.
Channels
- Full channel access — configure, view, and manage every connected communication channel.
Members
- View Members — see the list of all team members.
- Update Members — edit another member's details and permissions.
- Remove Members — remove a member from the business.
- Invite Members — send email invitations to new teammates.
Helpdesk (chat)
- Allowed to answer chat — reply to customer messages in your channels.
- Allowed to create inbox — create new inboxes to organise chats.
Developers
- Allow to use webhook feature — create and manage webhook integrations.
Planner
- Allow to use planner feature — create, assign, and manage tasks in Planner.
Note: Depending on your plan, other modules — such as CRM, Marketing, and Commerce — add their own permission groups on the same screen. Tick only what each teammate needs.
Remove a teammate
To take someone out of your business:
- Open the teammate from the Team Members list.
- Go to the Settings tab and, in the Danger Zone, click Remove User.
- Confirm. Their access is revoked immediately.
Note: You can't remove yourself or the business owner. Removing a member can't be undone — you'd need to re-invite them to restore access.
Cancel a pending invitation
If you invited someone by mistake or they no longer need access, find their row under Pending Invitations and click Delete. The invitation is revoked and the seat is freed up.