.png)
Automations let Renr do repetitive work for you — sending a message, creating a task, or calling another app — without you lifting a finger. In this guide you will build your very first workflow and turn it on.
How an automation works
Every automation has two parts:
- A trigger — the event that starts it, such as a new task is created or a schedule fires.
- Steps — the actions that run in order when the trigger fires, such as send an email or create a task.
When the trigger happens, Renr runs your steps from top to bottom.
Create your automation
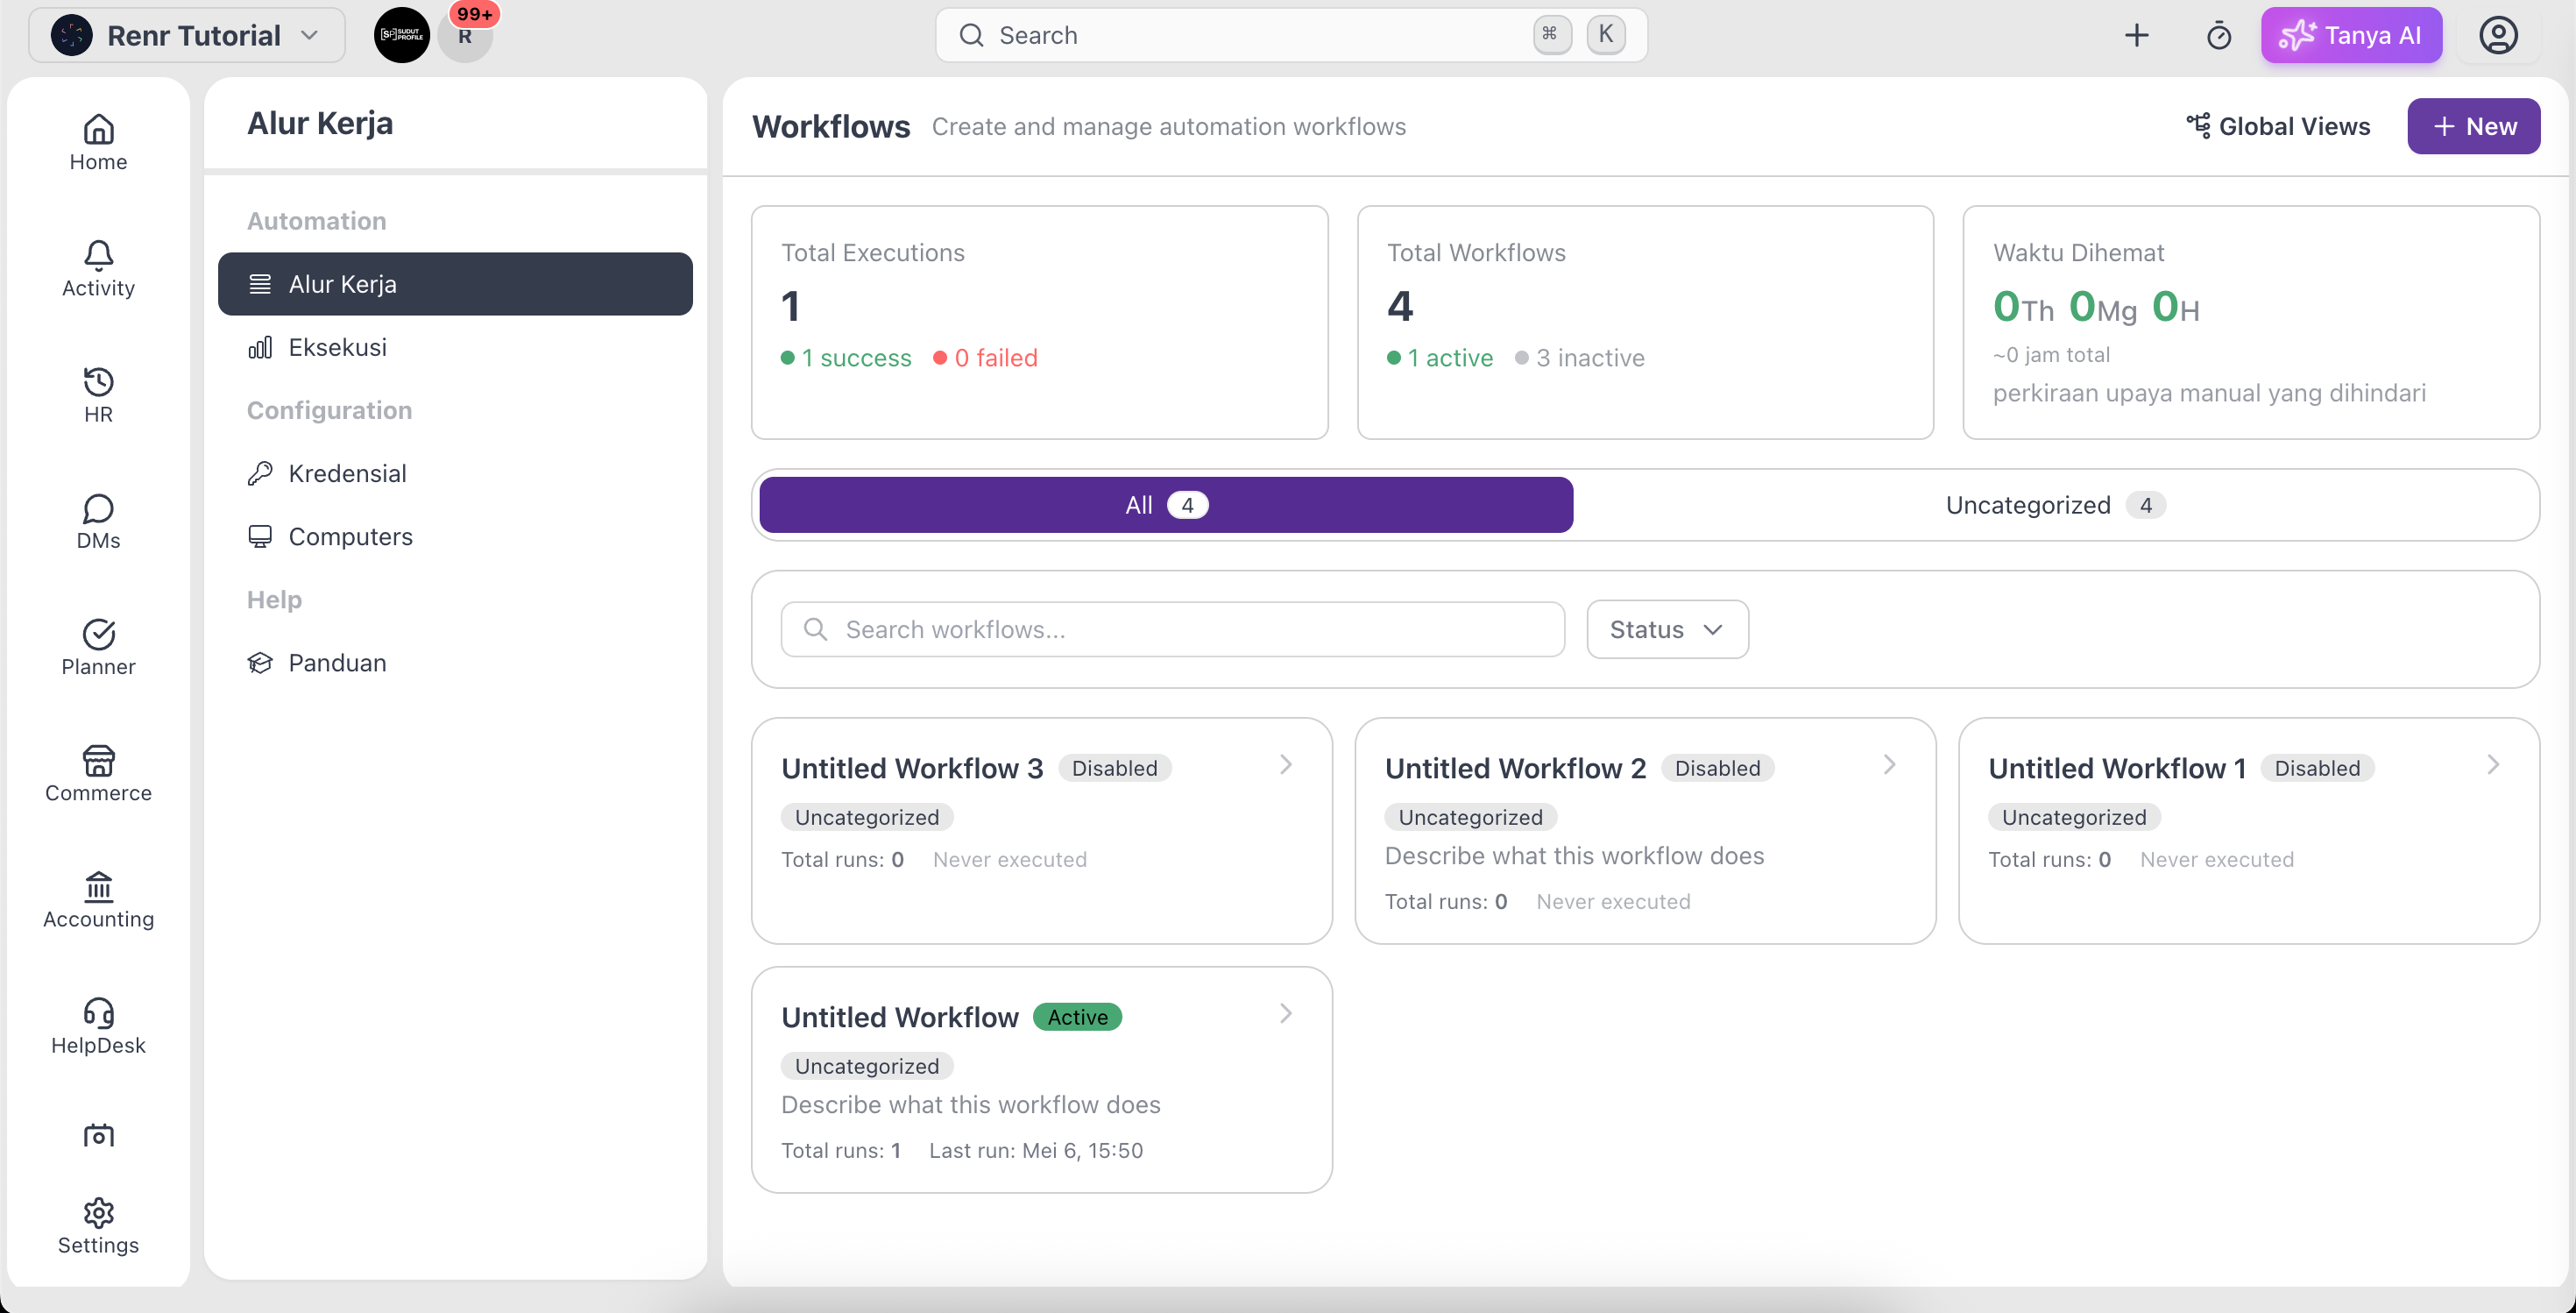
- From the left menu, open Workflows.
- Click New in the top-right corner. A fresh workflow opens in the editor.
- Give it a clear name and a short description so your team knows what it does.
- Add a trigger to decide what starts the automation.
- Add one or more steps to decide what happens next.
- Click Save. Your workflow is saved as a draft.
Turn it on
New workflows start as drafts and do nothing until you switch them on.
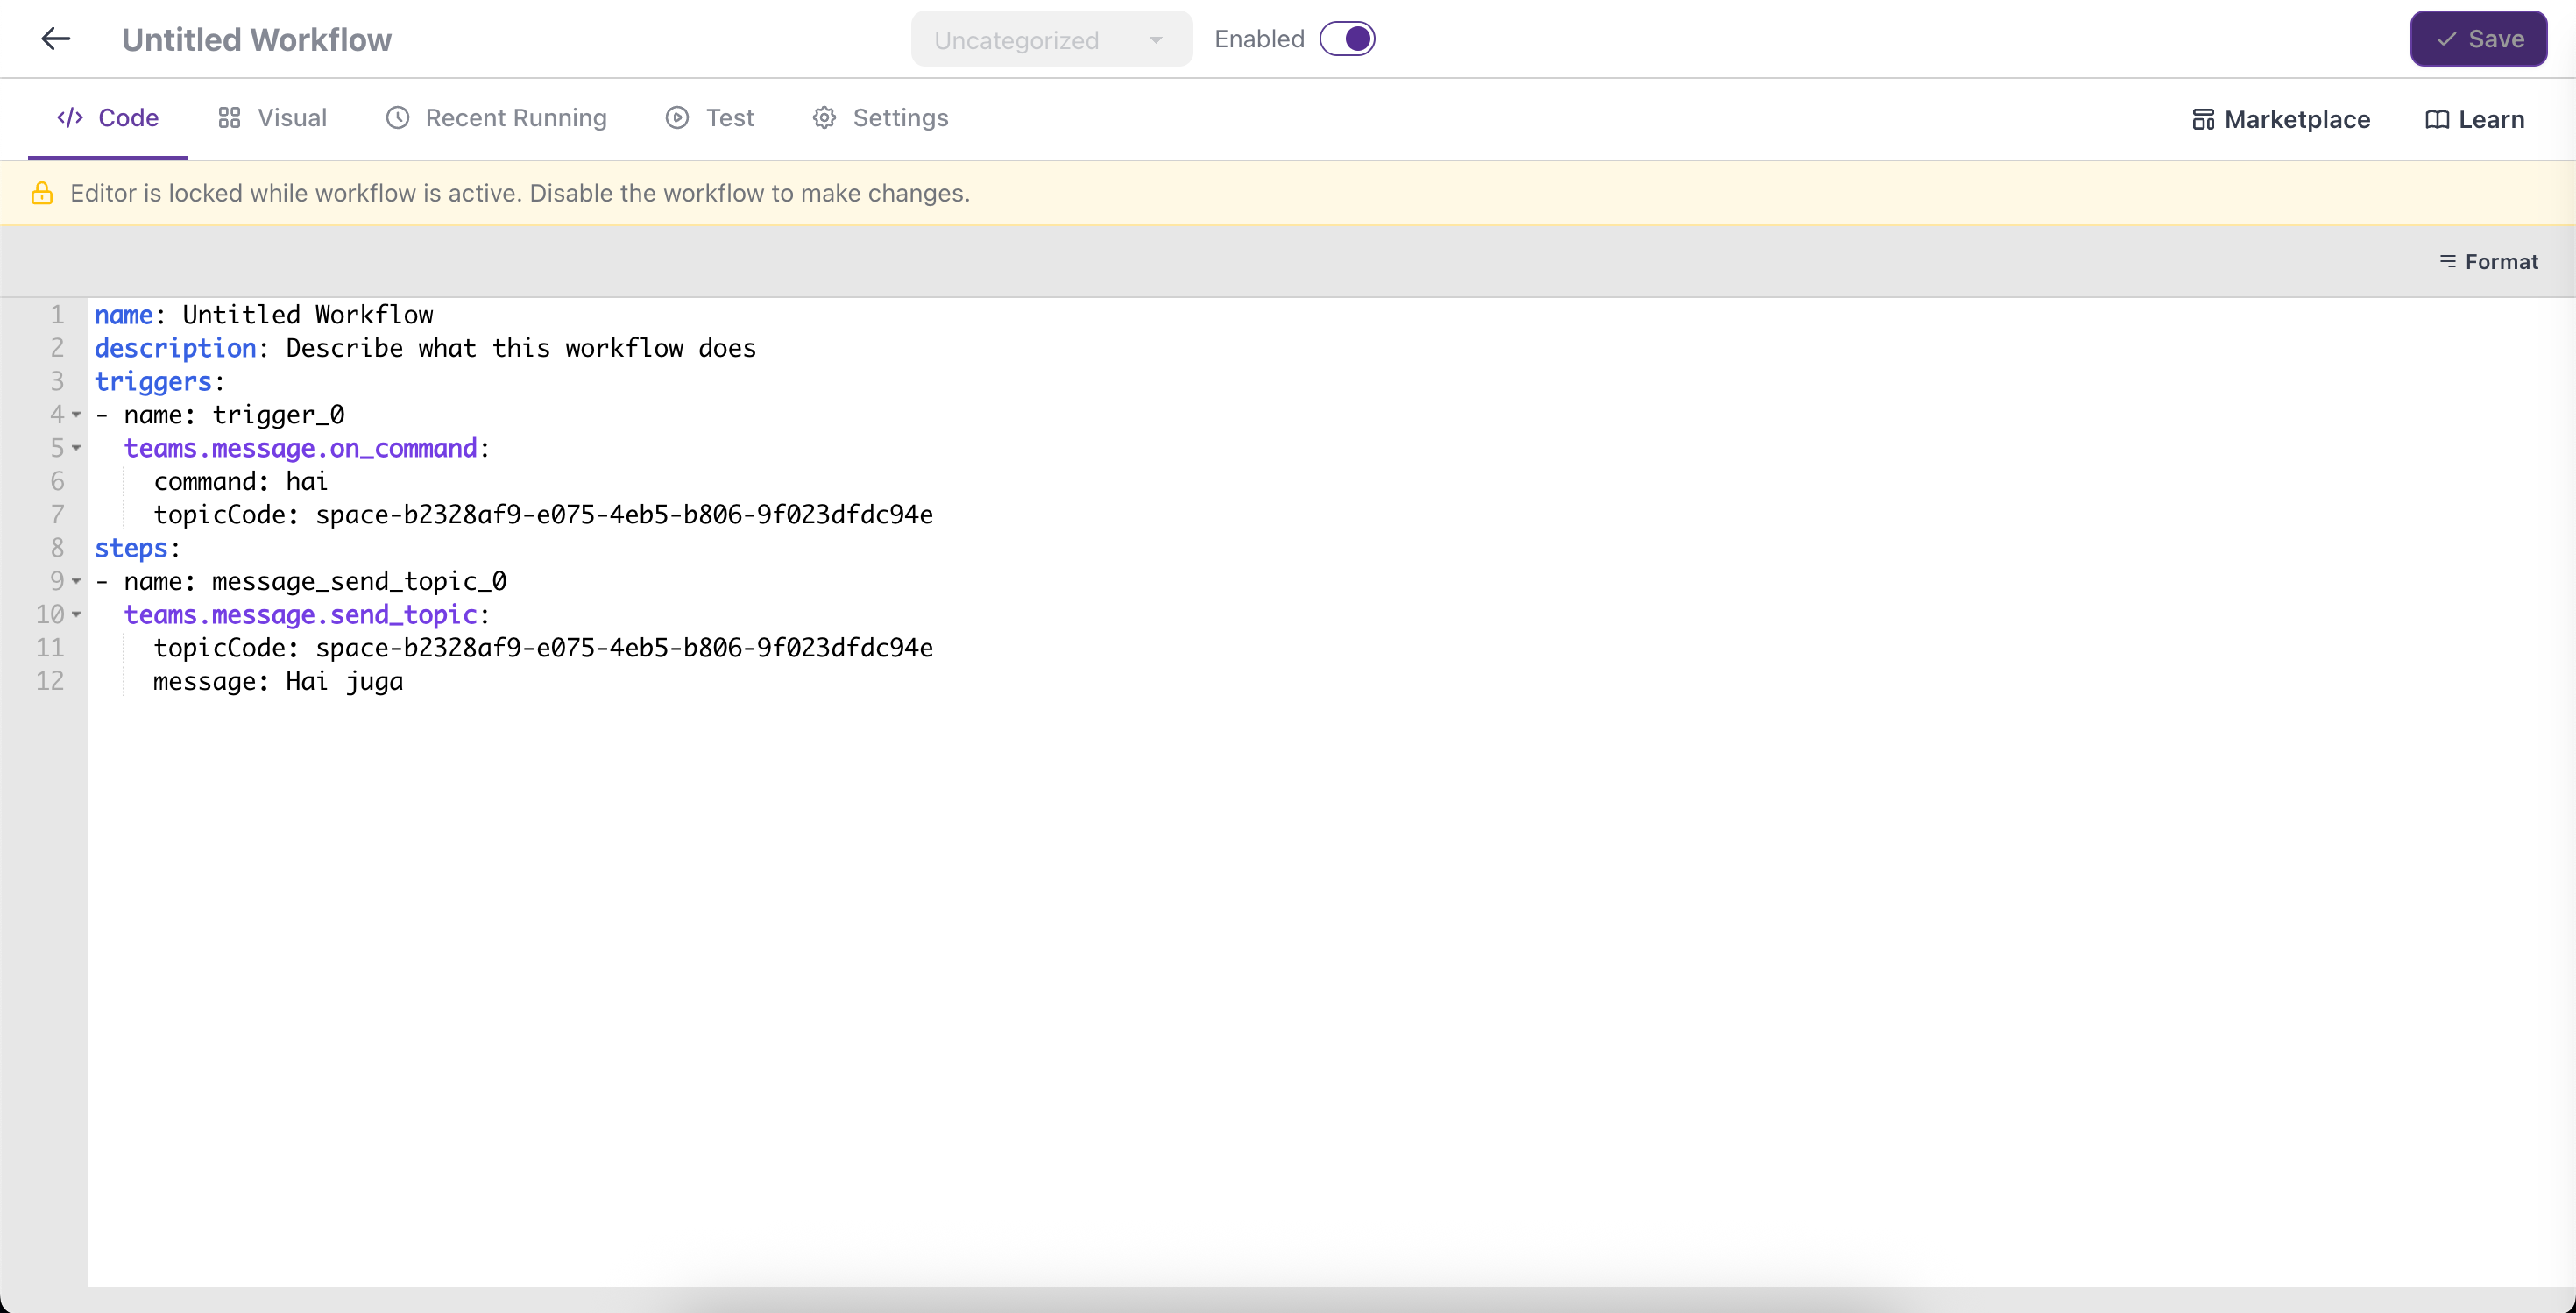
- In the editor, flip the Enabled toggle on.
- Renr checks your workflow for errors before activating it.
Tip: Want to test it right away? Click Run Now to run the workflow once immediately, without waiting for the trigger.
Find your way around
Open the Learn tab inside the editor to browse every available trigger and action, each with a description and a ready-to-copy example. The Recent Running tab shows each time your workflow ran and whether it succeeded.
Note: Not sure where to start? Click From Template to begin from a pre-built workflow you can adjust to your needs.